World Map: Difference between revisions
From Against the Storm Official Wiki
(→List of negative world modifiers: added modifier rewards) |
Anteprefix (talk | contribs) (→Map tiles and biomes: added coastal grove hex icon and link) |
||
| (5 intermediate revisions by 2 users not shown) | |||
| Line 1: | Line 1: | ||
{{Version|1.3.3}} | |||
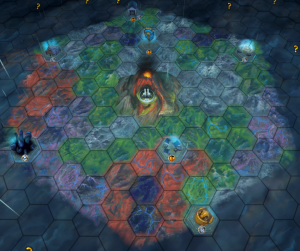
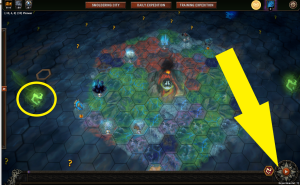
[[File:Biomes.png|thumb|450|Screenshot of the world map]] | [[File:Biomes.png|thumb|450|Screenshot of the world map]] | ||
| Line 27: | Line 28: | ||
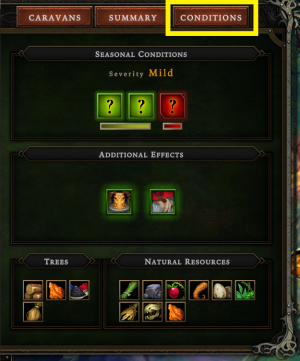
[[File:BiomeConditionsTab.png|thumb|300px|Biome Conditions]] | [[File:BiomeConditionsTab.png|thumb|300px|Biome Conditions]] | ||
The world map has 6 biomes. See their articles for more details. | The world map has 6 biomes, plus 1 DLC exclusive biome. See their articles for more details. | ||
* The [[File:CoastalGroveHex.png|{{ImgM}}]] [[Coastal Grove]] | |||
* The [[File:CoralForestHex.png|{{ImgM}}]] [[Coral Forest]] | * The [[File:CoralForestHex.png|{{ImgM}}]] [[Coral Forest]] | ||
* The [[File:CursedRoyalWoodlandsHex.png|{{ImgM}}]] [[Cursed Royal Woodlands]] | * The [[File:CursedRoyalWoodlandsHex.png|{{ImgM}}]] [[Cursed Royal Woodlands]] | ||
| Line 63: | Line 65: | ||
=== Embarkation Costs === | === Embarkation Costs === | ||
The cost of Embarkation Bonuses will change with every caravan, this is to encourage players to try out different starting patterns. They are as follows | The cost of Embarkation Bonuses will change with every caravan, this is to encourage players to try out different starting patterns. They are as follows: | ||
{| class="wikitable sortable" | {| class="wikitable sortable" | ||
|- style="font-weight:bold; text-align:center;" | |- | ||
! style="font-weight:bold; text-align:center;" | Bonus | |||
! Cost | ! style="font-weight:bold; text-align:center;" | Cost | ||
|- | |- | ||
| {{rl|Amber}} | | {{rl|Amber}} | ||
| | | 3 - 5 | ||
|- | |- | ||
| [[File:Icon_MetaReward_BlueprintChoice.png|16px]] Blueprints | | [[File:Icon_MetaReward_BlueprintChoice.png|16px]] Blueprints | ||
| Line 82: | Line 84: | ||
| 3 - 5 | | 3 - 5 | ||
|- | |- | ||
| [[File:CornerstoneReroll.png|16px]] Cornerstone | | 3 [[File:CornerstoneReroll.png|16px]] Cornerstone Rerolls | ||
| 2 | | 1 - 2 | ||
|- | |- | ||
| [[File:FlatIcon_Order_DeliverGoods.png|16px]] Delivery Lines | | [[File:FlatIcon_Order_DeliverGoods.png|16px]] Delivery Lines | ||
| Line 94: | Line 96: | ||
| 1 - 2 | | 1 - 2 | ||
|- | |- | ||
| {{rl|Pack of Provisions}} | | {{rl|Pack of Provisions}} / {{rl|Parts}} | ||
| 3 - 4 | |||
| 3 - | |||
|- | |- | ||
| {{rl|Planks}} | | {{rl|Planks}} | ||
| Line 110: | Line 109: | ||
|- | |- | ||
| [[File:Icon_UI_RandomVillager.png|16px]] Villagers | | [[File:Icon_UI_RandomVillager.png|16px]] Villagers | ||
| | | 2 | ||
|} | |} | ||
For more information surroundinig embarkation, please see [[Embarking]] | |||
=== World events === | === World events === | ||
| Line 220: | Line 221: | ||
| A chosen World Map Modifier will appear | | A chosen World Map Modifier will appear | ||
| Lose 10 [[File:Icon MetaResource Artifact.png|16px]] Artifacts | | Lose 10 [[File:Icon MetaResource Artifact.png|16px]] Artifacts | ||
| Gain | | Gain 40 [[File:Icon MetaResource FoodStockpiles.png|16px]] Food Stockpiles | ||
|- | |- | ||
| {{Perk|Gray|File:Somber_Procession.png}}<br />Somber Procession | | {{Perk|Gray|File:Somber_Procession.png}}<br />Somber Procession | ||
| Line 253: | Line 254: | ||
{| class="wikitable sortable mw-collapsible" | {| class="wikitable sortable mw-collapsible" | ||
|+ World modifiers that benefit settlements | |+ World modifiers that benefit settlements | ||
! World modifier !!class=unsortable| Description | ! World modifier !! Rewards !!class=unsortable| Description | ||
|- | |- | ||
| {{Perk|{{PerkGreen}}|File:AbandonedSettlement.png}} Abandoned Settlement | | {{Perk|{{PerkGreen}}|File:AbandonedSettlement.png}} Abandoned Settlement | ||
| [[File:Icon MetaResource FoodStockpiles.png|{{ImgM}}]] | |||
| Another Viceroy tried to settle this area, but unfortunately failed... You start with a small destroyed settlement in your initial glade. | | Another Viceroy tried to settle this area, but unfortunately failed... You start with a small destroyed settlement in your initial glade. | ||
|- | |- | ||
| {{Perk|{{PerkGreen}}|File:FertileGrounds.png}} Fertile Grounds | | {{Perk|{{PerkGreen}}|File:FertileGrounds.png}} Fertile Grounds | ||
| [[File:Icon MetaResource FoodStockpiles.png|{{ImgM}}]] | |||
| Glades have an increased chance of including [[Fertile Soil]]. | | Glades have an increased chance of including [[Fertile Soil]]. | ||
|- | |- | ||
| {{Perk|{{PerkGreen}}|File:ForsakenGodsTemple.png}} Forsaken Gods Temple | | {{Perk|{{PerkGreen}}|File:ForsakenGodsTemple.png}} Forsaken Gods Temple | ||
| [[File:Icon MetaResource Artifact.png|{{ImgM}}]] | |||
| The Forsaken Gods' blessings can be ambiguous. You have a higher chance of receiving timed [[Order]]s from the Crown. | | The Forsaken Gods' blessings can be ambiguous. You have a higher chance of receiving timed [[Order]]s from the Crown. | ||
|- | |- | ||
| {{Perk|{{PerkGreen}}|File:LevitatingMonument.png}} Levitating Monument | | {{Perk|{{PerkGreen}}|File:LevitatingMonument.png}} Levitating Monument | ||
| [[File:Icon MetaResource Artifact.png|{{ImgM}}]] | |||
| The power of a nearby monument makes everything feel lighter. You can move most buildings in your settlement. | | The power of a nearby monument makes everything feel lighter. You can move most buildings in your settlement. | ||
|- | |- | ||
| {{Perk|{{PerkGreen}}|File:OverGrownLibrary.png}} Overgrown Library | | {{Perk|{{PerkGreen}}|File:OverGrownLibrary.png}} Overgrown Library | ||
| [[File:Icon MetaResource FoodStockpiles.png|{{ImgM}}]][[File:Icon MetaResource Machinery.png|{{ImgM}}]] | |||
| A remnant of a bygone era, when royal archivists themselves ventured out into the wilderness in search of knowledge. One of your starting [[Blueprints|Blueprint choices]] is replaced by a Wildcard (you can choose one blueprint from all unlocked blueprints). | | A remnant of a bygone era, when royal archivists themselves ventured out into the wilderness in search of knowledge. One of your starting [[Blueprints|Blueprint choices]] is replaced by a Wildcard (you can choose one blueprint from all unlocked blueprints). | ||
|- | |- | ||
| {{Perk|{{PerkGreen}}|File:PetrifiedNecropolis.png}} Petrified Necropolis | | {{Perk|{{PerkGreen}}|File:PetrifiedNecropolis.png}} Petrified Necropolis | ||
| [[File:Icon MetaResource FoodStockpiles.png|{{ImgM}}]] | |||
| Rocks in this region have a very peculiar shape. And they smell funny... Gain {{rl|Meat}} for every {{rl|Stone}} or {{rl|Clay}} gathered. | | Rocks in this region have a very peculiar shape. And they smell funny... Gain {{rl|Meat}} for every {{rl|Stone}} or {{rl|Clay}} gathered. | ||
|- | |- | ||
| {{Perk|{{PerkGreen}}|File:RoyalOutpost.png}} Royal Outpost | | {{Perk|{{PerkGreen}}|File:RoyalOutpost.png}} Royal Outpost | ||
| [[File:Icon MetaResource FoodStockpiles.png|{{ImgM}}]] | |||
| The proximity of a Royal Outpost makes it easier to communicate with the crown. The pool of [[Orders|Order choices]] will increase by 1. | | The proximity of a Royal Outpost makes it easier to communicate with the crown. The pool of [[Orders|Order choices]] will increase by 1. | ||
|- | |- | ||
| {{Perk|{{PerkGreen}}|File:RuinedArmory.png}} Ruined Armory | | {{Perk|{{PerkGreen}}|File:RuinedArmory.png}} Ruined Armory | ||
| [[File:Icon MetaResource FoodStockpiles.png|{{ImgM}}]][[File:Icon MetaResource Machinery.png|{{ImgM}}]] | |||
| An old abandoned armory, left behind after the Great Civil War. No villagers will die when attacking a [[Trader]]. | | An old abandoned armory, left behind after the Great Civil War. No villagers will die when attacking a [[Trader]]. | ||
|- | |- | ||
| {{Perk|{{PerkGreen}}|File:RuinsModifier.png}} Ruins | | {{Perk|{{PerkGreen}}|File:RuinsModifier.png}} Ruins | ||
| [[File:Icon MetaResource Machinery.png|{{ImgM}}]] | |||
| This region was settled very frequently in the past. The chance of finding [[Ruins]] in glades is much higher. | | This region was settled very frequently in the past. The chance of finding [[Ruins]] in glades is much higher. | ||
|- | |- | ||
| {{Perk|{{PerkGreen}}|File:WatchTower.png}} Watchtower | | {{Perk|{{PerkGreen}}|File:WatchTower.png}} Watchtower | ||
| [[File:Icon MetaResource FoodStockpiles.png|{{ImgM}}]] | |||
| The Royal Guard is watching over this region. Discovering glades doesn't increase [[Hostility]] | | The Royal Guard is watching over this region. Discovering glades doesn't increase [[Hostility]] | ||
|} | |} | ||
Latest revision as of 21:56, 22 October 2024
Overview
The World Map is where Viceroys plan their missions out from the Smoldering City to build settlements and make their way toward Seals. Choosing where on the map to go for the next mission and Embarking, including selecting caravans and difficulty, are done from the World Map.
Smoldering City
The Smoldering City is at the center of the world map and is where all Viceroys start. This is where Viceroys can buy Upgrades, check their game history and visit their Home, once unlocked.
 Hooded Horse Wikis