The Forest: Difference between revisions
(→Bonus Raw Food Items: Updated the bonus resources and biomes and added grasscap mushroom and snake nest nodes) |
m (→Trees) |
||
| (26 intermediate revisions by 7 users not shown) | |||
| Line 1: | Line 1: | ||
All | {{Version|1.3.4}} | ||
[[File:Walkthrough-1-10-b-glades.png|thumb|right|480px|The Forest, full of trees and glades]] | |||
== The Forest == | |||
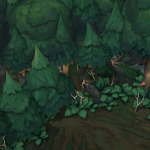
All [[Settlements]] are constructed in The Forest. The Forest consists of multiple [[#Glades | Glades]] separated by a dense carpet of [[#Trees | Trees]]. | |||
== Seasons == | |||
{{MainArticle|Seasons}} | |||
Each Settlement must brave the three seasons of The Forest: | |||
# [[File:Drizzle.png|40px]] Drizzle lasts 4:00 minutes. | |||
# [[File:Clearance.png|40px]] Clearance lasts 4:00 minutes. | |||
# [[File:Storm 2.png|40px]] Storm lasts 2:00 or 4:00 minutes depending on [[Difficulty]]. | |||
== Hostility == | == Hostility == | ||
Hostility | {{MainArticle|Hostility}} | ||
<blockquote> | |||
''With every fallen tree, with every ancient site sacked - the Forest grows angrier.'' | |||
</blockquote> | |||
Hostility is a measure of how wary the forest is of the settlement. It always starts at 0. Each Hostility level above 0 will decrease Global [[Resolve]] by 2 (6 during storms) and may activate a negative [[Forest Mystery]]. All modifiers that raise Hostility scale with [[Difficulty]]. | |||
== Trees == | == Trees == | ||
Trees can be harvested by Woodcutters' Camp | |||
{| class="wikitable" | Trees can be harvested by {{bl|Woodcutters' Camp}}s to provide {{rl|Wood}}. Each tree has 2 charges, except Overgrown Abyssal trees, which has 20. Trees may also grant additional Resources depending on the [[World_Map#Map_tiles_and_biomes| Biome]]. You can always hover over an individual tree to see what Resources it provides. | ||
! Tree !! Biome !! Additional resources | |||
You can set what chopping behavior you want each Woodcutters' Camp to use. You can also set a Default Woodcutters' Camp Mode from the Gameplay Settings. | |||
'''Woodcutters' Camp Modes''' | |||
* Fell All Trees - All trees will be felled | |||
* Avoid Glades - All trees will be felled EXCEPT trees that open glades. | |||
* Avoid Glades (except marked) - All trees will be felled EXCEPT trees that open glades, UNLESS you have marked glade-opening trees. | |||
* Only Marked Trees - Only marked trees will be felled. | |||
* Only Marked Trees & Avoid Glades - Only marked trees will be felled, and glade-opening trees will be avoided. | |||
[[File:Mark_And_Unmark_Tools.png|thumb|Mark and unmark tools]]Usually (unless you are using Fell All Trees or Avoid Glades) you must mark which trees you would like to Woodcutters' camps to fell. You can click the green axe icon with the plus sign to the right of the building menus at the bottom of the screen - or use the hotkey (defaults to [F]) - to begin marking trees with a 3-tree width painting tool. Marked trees which are in range of a Woodcutters' Camp are highlighted in yellow, marked trees which are out of range are highlighted in grey. | |||
If you need to unmark trees, you can click the green axe icon with the minus sign - or use the hotkey (defaults to [G]) - to begin unmarking trees with a similar 3-tree width painting tool. | |||
If you hold the [Shift] key while using the marking or unmarking paint tool, the width of the tool decreases to a single tree - allowing you to be very precise, useful to help you pick out Overgrown Abyssal trees in Sealed Forest. If you hold the [Ctrl] key while using the marking tool, you cannot mark trees which would open [[#Glades | Glades]]. You can use both [Shift] and [Ctrl] at the same time. | |||
{| class="wikitable sortable mw-collapsible" style="vertical-align:middle; width:100%;" | |||
|+ Trees across Biomes | |||
! Tree !! Biome !! Additional resources !! style="width: 25%" | Description !! Image | |||
|- | |||
| '''Abyssal Tree''' | |||
| Sealed Forest | |||
| {{rl|Meat}} (10%) +<br>{{rl|Sea Marrow}} (10%) +<br>{{rl|Leather}} (10%) | |||
| A bizarre, writhing growth... is this even really a tree? | |||
| [[File:Abyssal Trees.png|150px|centre|thumb|Abyssal Trees]] | |||
|- | |- | ||
| '''Coppervein Tree''' | | '''Coppervein Tree''' | ||
| Scarlet Orchard | | Scarlet Orchard | ||
| | | {{rl|Wood}} (60%) +<br>{{rl|Copper Ore}} (10%) +<br>{{rl|Pigment}} (5%) +<br>{{rl|Plant Fiber}} (5%) | ||
| A scarlet tree covered in enormous thorns. | |||
| [[File:Coppervein Tree.png|150px|centre|thumb|Coppervein Trees]] | |||
|- | |||
| '''Crimsonreach Tree''' | |||
| Coral Forest | |||
| {{rl|Stone}} (40%) +<br>{{rl|Incense}} (20%) | |||
| A mineralized coral tree. | |||
| [[File:Crimsonreach Tree.png|150px|centre|thumb|Crimsonreach Trees]] | |||
|- | |||
| '''Dying Tree''' | |||
| Cursed Royal Woodlands | |||
| {{rl|Wood}} (60%) +<br>{{rl|Insects}} (10%) +<br>{{rl|Plant Fiber}} (10%) +<br>{{rl|Roots}} (10%) | |||
|A bare, rotting tree infested with grubs. | |||
| [[File:Dying Tree.png|150px|centre|thumb|Dying Trees]] | |||
|- | |- | ||
| '''Lush Tree''' | | '''Lush Tree''' | ||
| Royal Woodlands | | Royal Woodlands | ||
| | | {{rl|Wood}} (100%) +<br>{{rl|Resin}} (15%) +<br>{{rl|Plant Fiber}} (10%) +<br>{{rl|Eggs}} (5%) | ||
| A perfect source of wood. | |||
| [[File:Lush Trees.png|150px|centre|thumb|Lush Trees]] | |||
|- | |- | ||
| '''Mushwood Tree''' | | '''Mushwood Tree''' | ||
| The Marshlands | | The Marshlands | ||
| | | {{rl|Mushrooms}} (15%) +<br>{{rl|Leather}} (5%) | ||
| A giant fungal tree covered in a leathery bark. | |||
| [[File:Mushwood Tree.png|150px|centre|thumb|Mushwood Trees]] | |||
|- | |- | ||
| ''' | | '''Musselsprout Tree''' | ||
| Coral Forest | | Coral Forest | ||
| | | {{rl|Meat}} (40%) +<br>{{rl|Crystalized Dew}} (20%) | ||
| The unusually hard bark conceals soft, fleshy tissue. | |||
| [[File:Musselsprout Tree.png|150px|centre|thumb|Musselsprout Trees]] | |||
|- | |- | ||
| ''' | | '''Overgrown Abyssal Tree''' | ||
| | | Sealed Forest | ||
| | | {{rl|Meat}} (10%) +<br>{{rl|Sea Marrow}} (10%) +<br>{{rl|Leather}} (10%) | ||
| A giant, bizarre growth... it's bigger than the other trees in the area. | |||
| [[File:Giant Abyssal Tree.png|150px|centre|thumb|Overgrown Abyssal Tree]] | |||
|- | |- | ||
| ''' | | '''Plateleaf Tree''' | ||
| Coral Forest | | Coral Forest | ||
| [[File: | | {{rl|Plant Fiber}} (30%) | ||
| A species of plant rarely seen above water. | |||
| [[File:Plateleaf Tree.png|150px|centre|thumb|Plateleaf Trees]] | |||
|} | |} | ||
== Resource | == Resource Deposits == | ||
Resource | Resource deposits are spots that allow [[villagers]] to gather [[resources]]. Each deposit can have its own priority set, when it is preferred to be harvested before or after other deposits. | ||
Resource | Resource deposits come in two types: Nodes and Veins. Nodes are gatherable with Camps and come in two sizes. Veins are gathered in the {{bl|Mine}}. | ||
Each | Each deposit has a number of Charges, representing the amount of times it can be harvested. Small resource deposits can be harvested '''15''' times if they provide raw food and '''20''' times if they provide raw crafting materials. Large resource deposits of raw crafting materials can be harvested '''60''' times. Large raw food deposits can be harvested '''70''' times and only by large camps. The number of charges can be increased by a total of '''12''' for all deposits in the '''Vanguard Spire''' branch of Smoldering City [[upgrades]]. {{rl|Coal}} and {{rl|Copper Ore}} veins are not affected by Smoldering City upgrades. | ||
{| class="wikitable" | |||
! | {| class="wikitable mw-collapsible" style="width: 100%;" | ||
|+ Resource Deposits across Biomes | |||
! style="width: 20%" | Deposit | |||
! style="width: 15%" | Guaranteed resources | |||
! Possible resources | |||
! style="width: 15%" | Gathered by | |||
! Biome | |||
! style="width: 20%" | Description | |||
|- | |||
| [[File:DebugNode SwampWheatBig icon.png|50px]] Swamp Wheat Field (big) | |||
| rowspan="2" | {{rl|Grain|med}} | |||
| {{rl|Plant Fiber}} (100%) +<br />{{rl|Plant Fiber}} (20%) | |||
| rowspan="2" | {{bl|Foragers' Camp|med}} | |||
| rowspan="2" | Cursed Royal Woodlands<br />Scarlet Orchard<br />The Marshlands | |||
| rowspan="2" | ''A plant species at home in the swamp.'' | |||
|- | |||
| [[File:DebugNode SwampWheatSmall icon.png|50px]] Swamp Wheat Field (small) | |||
| {{rl|Plant Fiber}} (20%) | |||
|- | |||
| [[File:DebugNode RootsBig icon.png|50px]] Root Deposit (big) | |||
| rowspan="2" | {{rl|Roots|med}} | |||
| {{rl|Herbs}} (30%) +<br />{{rl|Resin}} (30%) | |||
| rowspan="2" | {{bl|Foragers' Camp|med}} | |||
| rowspan="2" | Royal Woodlands<br />Scarlet Orchard<br />Sealed Forest | |||
| rowspan="2" | ''A tangled net of living vines.'' | |||
|- | |||
| [[File:DebugNode RootsSmall icon.png|50px]] Root Deposit (small) | |||
| {{rl|Herbs}} (20%) | |||
|- | |- | ||
| [[File:DebugNode | | [[File:DebugNode MossBroccoliBig icon.png|50px]] Moss Broccoli Patch (big) | ||
| rowspan=2 | | | rowspan="2" | {{rl|Vegetables|med}} | ||
| | | {{rl|Insects}} (40%) +<br />{{rl|Roots}} (20%) | ||
| rowspan=2 | | | rowspan="2" | {{bl|Foragers' Camp|med}} | ||
| rowspan=2 | | | rowspan="2" | Coral Forest<br />Cursed Royal Woodlands<br />Royal Woodlands | ||
| rowspan=2 | '' | | rowspan="2" | ''An edible and tasty type of moss.'' | ||
|- | |- | ||
| [[File:DebugNode | | [[File:DebugNode MossBroccoliSmall icon.png|50px]] Moss Broccoli Patch (small) | ||
| | | {{rl|Insects}} (30%) | ||
|- | |- | ||
| [[File:DebugNode | | [[File:DebugNode FlaxBig icon.png|50px]] Flax Field (big) | ||
| rowspan=2 | | | rowspan="2" | {{rl|Plant Fiber|med}} | ||
| | | {{rl|Clay}} (50%) +<br />{{rl|Insects}} (30%) | ||
| rowspan=2 | | | rowspan="2" | {{bl|Harvesters' Camp|med}} | ||
| rowspan=2 | Royal Woodlands<br> | | rowspan="2" | Cursed Royal Woodlands<br />Royal Woodlands | ||
| rowspan=2 | '' | | rowspan="2" | ''Resilient plants perfect for cloth-making.'' | ||
|- | |- | ||
| [[File:DebugNode | | [[File:DebugNode FlaxSmall icon.png|50px]] Flax Field (small) | ||
| | | {{rl|Clay}} (25%) +<br />{{rl|Insects}} (20%) | ||
|- | |- | ||
| [[File:DebugNode | | [[File:DebugNode ReedBig icon.png|50px]] Reed Field (big) | ||
| rowspan=2 | | | rowspan="2" | {{rl|Reed|med}} | ||
| | | {{rl|Clay}} (40%) +<br />{{rl|Roots}} (40%) | ||
| rowspan=2 | | | rowspan="2" | {{bl|Harvesters' Camp|med}} | ||
| rowspan=2 | | | rowspan="2" | Coral Forest<br />Scarlet Orchard<br />Sealed Forest | ||
| rowspan=2 | '' | | rowspan="2" | ''A very common plant, it thrives thanks to the magical rain.'' | ||
|- | |- | ||
| [[File:DebugNode | | [[File:DebugNode ReedSmall icon.png|50px]] Reed Field (small) | ||
| | | {{rl|Clay}} (20%) +<br />{{rl|Roots}} (20%) | ||
|- | |- | ||
| [[File:DebugNode DewberryBushBig icon.png|50px]] Dewberry Bush (big) | | [[File:DebugNode DewberryBushBig icon.png|50px]] Dewberry Bush (big) | ||
| rowspan=2 | | | rowspan="2" | {{rl|Berries|med}} | ||
| | | {{rl|Berries}} (80%) | ||
| rowspan=2 | | | rowspan="2" | {{bl|Herbalists' Camp|med}} | ||
| rowspan=2 | Royal Woodlands<br>Scarlet Orchard | | rowspan="2" | Royal Woodlands<br />Scarlet Orchard<br />Sealed Forest | ||
| rowspan=2 | ''Fresh and sweet berries infused by the Rain.'' | | rowspan="2" | ''Fresh and sweet berries infused by the Rain.'' | ||
|- | |- | ||
| [[File:DebugNode DewberryBushSmall icon.png|50px]] Dewberry Bush (small) | | [[File:DebugNode DewberryBushSmall icon.png|50px]] Dewberry Bush (small) | ||
| | | {{rl|Berries}} (20%) | ||
|- | |- | ||
| [[File:DebugNode | | [[File:DebugNode HerbsBig icon.png|50px]] Herb Deposit (big) | ||
| rowspan=2 | | | rowspan="2" | {{rl|Herbs|med}} | ||
| | | {{rl|Berries}} (40%) +<br />{{rl|Plant Fiber}} (20%) | ||
| rowspan=2 | | | rowspan="2" | {{bl|Herbalists' Camp|med}} | ||
| rowspan=2 | | | rowspan="2" | Coral Forest<br />Cursed Royal Woodlands<br />Scarlet Orchard | ||
| rowspan=2 | '' | | rowspan="2" | ''A dense shrub full of many useful plant species.'' | ||
|- | |- | ||
| [[File:DebugNode | | [[File:DebugNode HerbsSmall icon.png|50px]] Herb Deposit (small) | ||
| | | {{rl|Berries}} (20%) | ||
|- | |- | ||
| [[File:DebugNode | | [[File:DebugNode MushroomBig icon.png|50px]] Bleeding Tooth Mushroom (big) | ||
| rowspan=2 | | | rowspan="2" | {{rl|Mushrooms|med}} | ||
| | | {{rl|Insects}} (40%) | ||
| rowspan=2 | | | rowspan="2" | {{bl|Herbalists' Camp|med}} | ||
| rowspan=2 | | | rowspan="2" | Cursed Royal Woodlands<br />Royal Woodlands<br />Sealed Forest | ||
| rowspan=2 | ''A | | rowspan="2" | ''A resilient species that grows on marshy soil.'' | ||
|- | |- | ||
| [[File:DebugNode | | [[File:DebugNode MushroomSmall icon.png|50px]] Bleeding Tooth Mushroom (small) | ||
| | | {{rl|Insects}} (20%) | ||
|- | |- | ||
| [[File:DebugNode | | [[File:DebugNode MarshlandsMushroomBig icon.png|50px]] Grasscap Mushroom (big) | ||
| rowspan=2 | | | rowspan="2" | {{rl|Mushrooms|med}} | ||
| | | {{rl|Insects}} (40%) | ||
| rowspan=2 | | | rowspan="2" | {{bl|Herbalists' Camp|med}} | ||
| rowspan=2 | | | rowspan="2" | The Marshlands<br /> | ||
| rowspan=2 | '' | | rowspan="2" | ''A resilient species that grows on marshy soil.'' | ||
|- | |- | ||
| [[File: | | [[File:DebugNode_MarshlandsMushroomSmall_icon.png|50px]] Grasscap Mushroom (small) | ||
| | | {{rl|Insects}} (20%) | ||
|- | |- | ||
| [[File:DebugNode | | [[File:DebugNode ClayBig icon.png|50px]] Clay Deposit (big) | ||
| rowspan=2 | | | rowspan="2" | {{rl|Clay|med}} | ||
| | | {{rl|Copper Ore}} (75%) +<br />{{rl|Roots}} (30%) | ||
| rowspan=2 | | | rowspan="2" | {{bl|Stonecutters' Camp|med}} | ||
| rowspan=2 | | | rowspan="2" | Cursed Royal Woodlands<br />Royal Woodlands<br />Sealed Forest | ||
| rowspan=2 | '' | | rowspan="2" | ''Soil infused with the essence of the rain.'' | ||
|- | |- | ||
| [[File:DebugNode | | [[File:DebugNode ClaySmall icon.png|50px]] Clay Deposit (small) | ||
| | | {{rl|Copper Ore}} (50%) +<br />{{rl|Roots}} (20%) | ||
|- | |- | ||
| [[File:DebugNode SeaMarrowBig icon.png|50px]] Sea Marrow Deposit (big) | | [[File:DebugNode SeaMarrowBig icon.png|50px]] Sea Marrow Deposit (big) | ||
| | | rowspan="2" | {{rl|Sea Marrow|med}} | ||
| | | {{rl|Sea Marrow}} (100%) +<br />{{rl|Stone}} (50%) +<br />{{rl|Ancient Tablet}} (1%) | ||
| rowspan=2 | | | rowspan="2" | {{bl|Stonecutters' Camp|med}} | ||
| rowspan=2 | Royal Woodlands<br>Scarlet Orchard<br> | | rowspan="2" | Cursed Royal Woodlands<br />Royal Woodlands<br />Scarlet Orchard<br />Sealed Forest | ||
| rowspan=2 | ''Ancient fossils rich in resources.'' | | rowspan="2" | ''Ancient fossils rich in resources.'' | ||
|- | |- | ||
| [[File:DebugNode SeaMarrowSmall icon.png|50px]] Sea Marrow Deposit (small) | | [[File:DebugNode SeaMarrowSmall icon.png|50px]] Sea Marrow Deposit (small) | ||
| | | {{rl|Sea Marrow}} (80%) +<br />{{rl|Stone}} (40%) | ||
|- | |- | ||
| [[File:DebugNode StoneBig icon.png|50px]] Stone Deposit (big) | | [[File:DebugNode StoneBig icon.png|50px]] Stone Deposit (big) | ||
| rowspan=2 | | | rowspan="2" | {{rl|Stone|med}} | ||
| | | {{rl|Insects}} (30%) +<br />{{rl|Roots}} (30%) +<br />{{rl|Copper Ore}} (10%) | ||
| rowspan=2 | | | rowspan="2" | {{bl|Stonecutters' Camp|med}} | ||
| rowspan=2 | Coral Forest<br>Scarlet Orchard<br>The Marshlands | | rowspan="2" | Coral Forest<br />Scarlet Orchard<br />The Marshlands | ||
| rowspan=2 | ''Stones weathered by the everlasting rain.'' | | rowspan="2" | ''Stones weathered by the everlasting rain.'' | ||
|- | |- | ||
| [[File:DebugNode StoneSmall icon.png|50px]] Stone Deposit (small) | | [[File:DebugNode StoneSmall icon.png|50px]] Stone Deposit (small) | ||
| | | {{rl|Insects}} (20%) +<br />{{rl|Roots}} (20%) | ||
|- | |- | ||
| [[File:DebugNode StormbirdNestBig icon.png|50px]] | | [[File:DebugNode StormbirdNestBig icon.png|50px]] Drizzlewing Nest (big) | ||
| rowspan=2 | | | rowspan="2" | {{rl|Eggs|med}} | ||
| | | {{rl|Meat}} (40%) | ||
| rowspan=2 | | | rowspan="2" | {{bl|Trappers' Camp|med}} | ||
| rowspan=2 | Royal Woodlands<br>Scarlet Orchard | | rowspan="2" | Royal Woodlands<br />Scarlet Orchard | ||
| rowspan=2 | ''An abandoned nest. Let's hope the owner doesn't come back...'' | | rowspan="2" | ''An abandoned nest. Let's hope the owner doesn't come back...'' | ||
|- | |- | ||
| [[File:DebugNode StormbirdNestSmall icon.png|50px]] | | [[File:DebugNode StormbirdNestSmall icon.png|50px]] Drizzlewing Nest (big) Nest (small) | ||
| | | {{rl|Meat}} (20%) | ||
|- | |- | ||
| [[File:DebugNode SnakeNestBig icon.png|50px]] Snake Nest (big) | | [[File:DebugNode SnakeNestBig icon.png|50px]] Snake Nest (big) | ||
| rowspan=2 | | | rowspan="2" | {{rl|Eggs|med}} | ||
| | | {{rl|Leather}} (40%) +<br />{{rl|Meat}} (20%) | ||
| rowspan=2 | | | rowspan="2" | {{bl|Trappers' Camp|med}} | ||
| rowspan=2 | | | rowspan="2" | The Marshlands<br /> | ||
| rowspan=2 | ''An abandoned nest. Let's hope the owner doesn't come back...'' | | rowspan="2" | ''An abandoned nest. Let's hope the owner doesn't come back...'' | ||
|- | |- | ||
| [[File:DebugNode SnakeNestSmall icon.png|50px]] Snake Nest (small) | | [[File:DebugNode SnakeNestSmall icon.png|50px]] Snake Nest (small) | ||
| [[File: | | {{rl|Leather}} (20%) | ||
|- | |||
| [[File:DebugNode WormtongueNestBig icon.png|50px]] Wormtongue Nest (big) | |||
| rowspan="2" | {{rl|Insects|med}} | |||
| {{rl|Insects}} (60%) | |||
| rowspan="2" | {{bl|Trappers' Camp|med}} | |||
| rowspan="2" | Coral Forest<br />Cursed Royal Woodlands<br />Sealed Forest | |||
| rowspan="2" | ''A nest full of tasty Wormtongues.'' | |||
|- | |||
| [[File:DebugNode WormtongueNestSmall icon.png|50px]] Wormtongue Nest (small) | |||
| {{rl|Insects}} (20%) | |||
|- | |||
| [[File:DebugNode SnailBroodmotherBig icon.png|50px]] Slickshell Broodmother (big) | |||
| rowspan="2" | {{rl|Meat|med}} | |||
| {{rl|Leather}} (100%) | |||
| rowspan="2" | {{bl|Trappers' Camp|med}} | |||
| rowspan="2" | Royal Woodlands<br />Sealed Forest | |||
| rowspan="2" | ''Small Slickshells are crawling out of the openings in the broodmother's shell. It's easy to collect them.'' | |||
|- | |- | ||
| [[File:DebugNode | | [[File:DebugNode SnailBroodmotherSmall icon.png|50px]] Slickshell Broodmother (small) | ||
| | | {{rl|Leather}} (20%) | ||
| | |- | ||
| rowspan=2 | | | [[File:DebugNode_LeechBroodmotherSmall_icon.png|50px]] Leech Broodmother (big) | ||
| rowspan=2 | | | rowspan="2" style="vertical-align:middle;" | {{rl|Meat|med}} | ||
| rowspan=2 | ''A | | {{rl|Leather}} (100%) +<br/>{{rl|Leather}} (60%) +<br/>{{rl|Eggs}} (20%) | ||
| rowspan="2" | {{bl|Trappers' Camp|med}} | |||
| rowspan="2" | Coral Forest<br />The Marshlands | |||
| rowspan="2" | ''A dead leech broodmother. It has a strong and somewhat sweet smell.'' | |||
|- | |- | ||
| [[File: | | [[File:DebugNode_LeechBroodmotherSmall_icon.png|50px]] Leech Broodmother (small) | ||
| | | {{rl|Leather}} (20%) | ||
|- | |- | ||
| [[File: | | [[File:Copper Vein.png|50px]] Copper Vein | ||
| | | {{rl|Copper Ore|med}} | ||
| | | {{rl|Clay}} (30%) | ||
| | | {{bl|Mine|med}} | ||
| Cursed Royal Woodlands<br/>The Marshlands<br/>Scarlet Orchard<br/>Sealed Forest | |||
| ''A soft and malleable metal, resistant to rain.'' | |||
|- | |- | ||
| [[File: | | [[File:Coal Vein.png|50px]] Coal Vein | ||
| | | {{rl|Coal|med}} | ||
| {{rl|Stone}} (30%) | |||
| {{bl|Mine|med}} | |||
| Coral Forest<br/>The Marshlands | |||
| ''An effective source of fuel.'' | |||
|} | |} | ||
== Glades == | == Glades == | ||
Glades are empty areas of the Forest that are shrouded until they are first reached by clearing trees. They may contain | ''Main article: [[Glades]]'' | ||
<blockquote> | |||
''Rich glades are full of resources - yours for the taking.'' | |||
</blockquote> | |||
Glades are empty areas of the Forest that are shrouded until they are first reached by clearing trees. They may contain resource deposits, fertile soil, and [[Glade Events]]. | |||
To reach a Glade faster, trees can be marked and unmarked for harvest via the axe icon on the bottom bar, ensuring they will be cut before other trees. Marked trees will glow golden if inside the area of a Woodcutters' Camp and white if outside one. | To reach a Glade faster, trees can be marked and unmarked for harvest via the axe icon on the bottom bar, ensuring they will be cut before other trees. Marked trees will glow golden if inside the area of a Woodcutters' Camp and white if outside one. | ||
The best rewards come from Dangerous Glades and especially Forbidden Glades | The best rewards come from Dangerous Glades and especially Forbidden Glades, but they always contain at least one Dangerous or Forbidden Glade Event, which requires delivering certain goods or completing a challenge. | ||
=== Glade Events === | === Glade Events === | ||
''Main article: [[Glade Events]]'' | ''Main article: [[Glade Events]]'' | ||
Glade Events are | Glade Events are points of interest found in the forest, like [[Abandoned Caches]], [[Survivor Camps]], [[Ruins]] etc. Some of them are positive, offering goods or new villagers for small resource investments. Others are dangerous, forcing you to act quickly to avoid negative consequences (but also giving you generous rewards for solving them). | ||
Once you select a Glade Event, the Event Panel will show up. There, you will find a few different sections: effects, worker slots, requirements, and rewards. The effect section shows you the possible negative consequences of the Event, and how much time you have before they occur. To solve an Event, you need to assign workers to it, select one of two reward options, and select "investigate". | Once you select a Glade Event, the Event Panel will show up. There, you will find a few different sections: effects, worker slots, requirements, and rewards. The effect section shows you the possible negative consequences of the Event, and how much time you have before they occur. To solve an Event, you need to assign workers to it, select one of two reward options, and select "investigate". | ||
| Line 236: | Line 327: | ||
Some events simply require you to deliver goods, others have something called a Working Effect. Working Effects are special conditions that activate once you give the order to investigate an Event (like a Resolve penalty, a slow debuff, etc.). Your goal is to survive these conditions for a set amount of time. After an Event is solved, the workers will bring back the rewards to your Storage, and no negative consequence will trigger. | Some events simply require you to deliver goods, others have something called a Working Effect. Working Effects are special conditions that activate once you give the order to investigate an Event (like a Resolve penalty, a slow debuff, etc.). Your goal is to survive these conditions for a set amount of time. After an Event is solved, the workers will bring back the rewards to your Storage, and no negative consequence will trigger. | ||
== | == See Also == | ||
* [[Villagers]] | |||
* [[Hostility]] | |||
[[Category:Forest]] | |||
[[Category:Glades]] | |||
[[Category:Settlements]] | |||
Latest revision as of 07:36, 17 June 2024
The Forest
All Settlements are constructed in The Forest. The Forest consists of multiple Glades separated by a dense carpet of Trees.
Seasons
- Main article: Seasons
Each Settlement must brave the three seasons of The Forest:
 Drizzle lasts 4:00 minutes.
 Clearance lasts 4:00 minutes.
 Storm lasts 2:00 or 4:00 minutes depending on Difficulty.
Hostility
- Main article: Hostility
With every fallen tree, with every ancient site sacked - the Forest grows angrier.
Hostility is a measure of how wary the forest is of the settlement. It always starts at 0. Each Hostility level above 0 will decrease Global Resolve by 2 (6 during storms) and may activate a negative Forest Mystery. All modifiers that raise Hostility scale with Difficulty.
Trees
Trees can be harvested by Woodcutters' Camps to provide ![]() Wood. Each tree has 2 charges, except Overgrown Abyssal trees, which has 20. Trees may also grant additional Resources depending on the Biome. You can always hover over an individual tree to see what Resources it provides.
Wood. Each tree has 2 charges, except Overgrown Abyssal trees, which has 20. Trees may also grant additional Resources depending on the Biome. You can always hover over an individual tree to see what Resources it provides.
You can set what chopping behavior you want each Woodcutters' Camp to use. You can also set a Default Woodcutters' Camp Mode from the Gameplay Settings.
Woodcutters' Camp Modes
- Fell All Trees - All trees will be felled
- Avoid Glades - All trees will be felled EXCEPT trees that open glades.
- Avoid Glades (except marked) - All trees will be felled EXCEPT trees that open glades, UNLESS you have marked glade-opening trees.
- Only Marked Trees - Only marked trees will be felled.
- Only Marked Trees & Avoid Glades - Only marked trees will be felled, and glade-opening trees will be avoided.
Usually (unless you are using Fell All Trees or Avoid Glades) you must mark which trees you would like to Woodcutters' camps to fell. You can click the green axe icon with the plus sign to the right of the building menus at the bottom of the screen - or use the hotkey (defaults to [F]) - to begin marking trees with a 3-tree width painting tool. Marked trees which are in range of a Woodcutters' Camp are highlighted in yellow, marked trees which are out of range are highlighted in grey.
If you need to unmark trees, you can click the green axe icon with the minus sign - or use the hotkey (defaults to [G]) - to begin unmarking trees with a similar 3-tree width painting tool.
If you hold the [Shift] key while using the marking or unmarking paint tool, the width of the tool decreases to a single tree - allowing you to be very precise, useful to help you pick out Overgrown Abyssal trees in Sealed Forest. If you hold the [Ctrl] key while using the marking tool, you cannot mark trees which would open Glades. You can use both [Shift] and [Ctrl] at the same time.
| Tree | Biome | Additional resources | Description | Image |
|---|---|---|---|---|
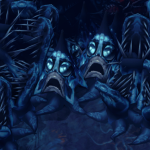
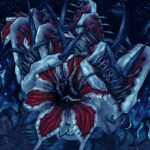
| Abyssal Tree | Sealed Forest | A bizarre, writhing growth... is this even really a tree? | ||
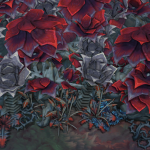
| Coppervein Tree | Scarlet Orchard | A scarlet tree covered in enormous thorns. | ||
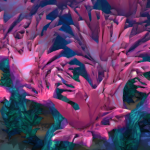
| Crimsonreach Tree | Coral Forest | A mineralized coral tree. | ||
| Dying Tree | Cursed Royal Woodlands | A bare, rotting tree infested with grubs. | ||
| Lush Tree | Royal Woodlands | A perfect source of wood. | ||
| Mushwood Tree | The Marshlands | A giant fungal tree covered in a leathery bark. | ||
| Musselsprout Tree | Coral Forest | The unusually hard bark conceals soft, fleshy tissue. | ||
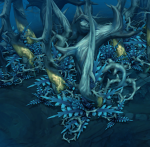
| Overgrown Abyssal Tree | Sealed Forest | A giant, bizarre growth... it's bigger than the other trees in the area. | ||
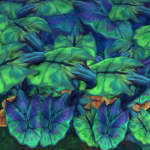
| Plateleaf Tree | Coral Forest | A species of plant rarely seen above water. |
Resource Deposits
Resource deposits are spots that allow villagers to gather resources. Each deposit can have its own priority set, when it is preferred to be harvested before or after other deposits.
Resource deposits come in two types: Nodes and Veins. Nodes are gatherable with Camps and come in two sizes. Veins are gathered in the Mine.
Each deposit has a number of Charges, representing the amount of times it can be harvested. Small resource deposits can be harvested 15 times if they provide raw food and 20 times if they provide raw crafting materials. Large resource deposits of raw crafting materials can be harvested 60 times. Large raw food deposits can be harvested 70 times and only by large camps. The number of charges can be increased by a total of 12 for all deposits in the Vanguard Spire branch of Smoldering City upgrades. ![]() Coal and
Coal and ![]() Copper Ore veins are not affected by Smoldering City upgrades.
Copper Ore veins are not affected by Smoldering City upgrades.
| Deposit | Guaranteed resources | Possible resources | Gathered by | Biome | Description |
|---|---|---|---|---|---|
| Cursed Royal Woodlands Scarlet Orchard The Marshlands |
A plant species at home in the swamp. | ||||
| Royal Woodlands Scarlet Orchard Sealed Forest |
A tangled net of living vines. | ||||
| Coral Forest Cursed Royal Woodlands Royal Woodlands |
An edible and tasty type of moss. | ||||
| Cursed Royal Woodlands Royal Woodlands |
Resilient plants perfect for cloth-making. | ||||
| Coral Forest Scarlet Orchard Sealed Forest |
A very common plant, it thrives thanks to the magical rain. | ||||
| Royal Woodlands Scarlet Orchard Sealed Forest |
Fresh and sweet berries infused by the Rain. | ||||
| Coral Forest Cursed Royal Woodlands Scarlet Orchard |
A dense shrub full of many useful plant species. | ||||
| Cursed Royal Woodlands Royal Woodlands Sealed Forest |
A resilient species that grows on marshy soil. | ||||
| The Marshlands |
A resilient species that grows on marshy soil. | ||||
| Cursed Royal Woodlands Royal Woodlands Sealed Forest |
Soil infused with the essence of the rain. | ||||
| Cursed Royal Woodlands Royal Woodlands Scarlet Orchard Sealed Forest |
Ancient fossils rich in resources. | ||||
| Coral Forest Scarlet Orchard The Marshlands |
Stones weathered by the everlasting rain. | ||||
| Royal Woodlands Scarlet Orchard |
An abandoned nest. Let's hope the owner doesn't come back... | ||||
| The Marshlands |
An abandoned nest. Let's hope the owner doesn't come back... | ||||
| Coral Forest Cursed Royal Woodlands Sealed Forest |
A nest full of tasty Wormtongues. | ||||
| Royal Woodlands Sealed Forest |
Small Slickshells are crawling out of the openings in the broodmother's shell. It's easy to collect them. | ||||
| Coral Forest The Marshlands |
A dead leech broodmother. It has a strong and somewhat sweet smell. | ||||
 Copper Vein Copper Vein
|
Cursed Royal Woodlands The Marshlands Scarlet Orchard Sealed Forest |
A soft and malleable metal, resistant to rain. | |||
 Coal Vein Coal Vein
|
Coral Forest The Marshlands |
An effective source of fuel. |
Glades
Main article: Glades
Rich glades are full of resources - yours for the taking.
Glades are empty areas of the Forest that are shrouded until they are first reached by clearing trees. They may contain resource deposits, fertile soil, and Glade Events.
To reach a Glade faster, trees can be marked and unmarked for harvest via the axe icon on the bottom bar, ensuring they will be cut before other trees. Marked trees will glow golden if inside the area of a Woodcutters' Camp and white if outside one.
The best rewards come from Dangerous Glades and especially Forbidden Glades, but they always contain at least one Dangerous or Forbidden Glade Event, which requires delivering certain goods or completing a challenge.
Glade Events
Main article: Glade Events
Glade Events are points of interest found in the forest, like Abandoned Caches, Survivor Camps, Ruins etc. Some of them are positive, offering goods or new villagers for small resource investments. Others are dangerous, forcing you to act quickly to avoid negative consequences (but also giving you generous rewards for solving them).
Once you select a Glade Event, the Event Panel will show up. There, you will find a few different sections: effects, worker slots, requirements, and rewards. The effect section shows you the possible negative consequences of the Event, and how much time you have before they occur. To solve an Event, you need to assign workers to it, select one of two reward options, and select "investigate".
Some events simply require you to deliver goods, others have something called a Working Effect. Working Effects are special conditions that activate once you give the order to investigate an Event (like a Resolve penalty, a slow debuff, etc.). Your goal is to survive these conditions for a set amount of time. After an Event is solved, the workers will bring back the rewards to your Storage, and no negative consequence will trigger.
 Hooded Horse Wikis

