Tutorial Walkthrough: Difference between revisions
(Added a note about demolishing a building to get a refund) |
m (→Categories: Category:Guides (As catch-all for beginner tips, walkthroughs, strategy articles etc.)) |
||
| (9 intermediate revisions by 4 users not shown) | |||
| Line 305: | Line 305: | ||
Once you unpause the game, the camp will be constructed by your villagers. None of your 9 villagers has any work, so they will automatically build for you. You do not need to tell any of them to do it. (In fact, you cannot issue commands to villagers in Against the Storm.) | Once you unpause the game, the camp will be constructed by your villagers. None of your 9 villagers has any work, so they will automatically build for you. You do not need to tell any of them to do it. (In fact, you cannot issue commands to villagers in Against the Storm.) | ||
One villager will first need to go to the big red building, the | One villager will first need to go to the big red building, the [[Main Warehouse]]. They will pick up the 2 {{rl|Parts}} that are required to build the Woodcutters' Camp. That villager will carry the Parts to the scaffolding then start construction. | ||
| Line 312: | Line 312: | ||
{{Walkthrough_info|Once a building's scaffolding contains all the required materials, villagers can start construction. In the case of the Woodcutters' Camp that only requires the 2 Parts, once the one villager returns with the Parts, other villagers can join in to make construction go faster.}} | {{Walkthrough_info|Once a building's scaffolding contains all the required materials, villagers can start construction. In the case of the Woodcutters' Camp that only requires the 2 Parts, once the one villager returns with the Parts, other villagers can join in to make construction go faster.}} | ||
=== 3. Assigning workers === | === 3. Assigning workers === | ||
| Line 331: | Line 329: | ||
{{Walkthrough_advice|Beavers are the best option for the Woodcutters' Camp because of the camp's Specialization Bonus, {{Specialization link| | {{Walkthrough_advice|Beavers are the best option for the Woodcutters' Camp because of the camp's Specialization Bonus, {{Specialization link|Woodworking}}. Beavers have this Specialization, so they get a small chance of gathering bonus wood from trees.}} | ||
{{Walkthrough_advice|You may place a second Woodcutters' Camp at this time if you wish. You might place it somewhere else to get different trees cut down or near the first to get those nearby trees cut down faster.}} | {{Walkthrough_advice|You may place a second Woodcutters' Camp at this time if you wish. You might place it somewhere else to get different trees cut down or near the first to get those nearby trees cut down faster.}} | ||
| Line 504: | Line 502: | ||
Occasionally, you'll be pleasantly surprised to see a new Order with objectives you've already or partially satisfied. In this case, you already had a Woodcutters' Camp with | Occasionally, you'll be pleasantly surprised to see a new Order with objectives you've already or partially satisfied. In this case, you already had a Woodcutters' Camp with workers assigned. If you assigned any Beavers as those workers, based on intuition or following along on this guide, then you already have 3/5 of the objective. If not, it's as simple as a few clicks to reassign the workers to be Beavers instead of Humans or Lizards. Or you may have even assigned Beavers in your second Woodcutters' Camp too, which means you already have the second objective of this Order satisfied. | ||
Almost every Order has multiple conditions to meet. '''In order to be able to deliver the Order, all conditions must be satisfied at the same time.''' This means that, until you've broken through the forest into two Glades, you don't have to have the Beavers assigned. However, to complete the tutorial faster, you'll want to assign all the workers you can to your two Woodcutters' Camps. | Almost every Order has multiple conditions to meet. '''In order to be able to deliver the Order, all conditions must be satisfied at the same time.''' This means that, until you've broken through the forest into two Glades, you don't have to have the Beavers assigned. However, to complete the tutorial faster, you'll want to assign all the workers you can to your two Woodcutters' Camps. | ||
| Line 514: | Line 512: | ||
{{Walkthrough_advice|The tutorial doesn't explicitly say this, but it is showing you that Beavers are the best option for the Woodcutters' Camp because of the camp's Specialization Bonus, {{Specialization link| | {{Walkthrough_advice|The tutorial doesn't explicitly say this, but it is showing you that Beavers are the best option for the Woodcutters' Camp because of the camp's Specialization Bonus, {{Specialization link|Woodworking}}. Beavers have this Specialization, so they get a small chance of gathering extra resources from trees. Their worker portrait in the camp looks different from a Human's or Lizard's, with a spinning gear behind their portrait. This means they get that production bonus.}} | ||
=== 3. Opening Glades === | === 3. Opening Glades === | ||
| Line 577: | Line 573: | ||
Your third Order requires you to use a new building to gather food from the forest. The tutorial village has access to {{rl|Vegetables}} in the Moss Broccoli Patches near the Main Warehouse. But you can't do anything with this resource deposit until you have the right camp. Meanwhile, your food supplies have been dwindling, because the only thing your villagers have been gathering is {{rl|Wood}}, and Wood is not food. In the tutorial, you have plenty of food, but in regular missions, you need to establish a food supply quickly. | Your third Order requires you to use a new building to gather food from the forest. The tutorial village has access to {{rl|Vegetables}} in the Moss Broccoli Patches near the Main Warehouse. But you can't do anything with this resource deposit until you have the right camp. Meanwhile, your food supplies have been dwindling, because the only thing your villagers have been gathering is {{rl|Wood}}, and Wood is not food. In the tutorial, you have plenty of food, but in regular missions, you need to establish a food supply quickly. | ||
This walkthrough hasn't yet addressed the two Blueprints you earned since the Woodcutters' Camp for your last two Orders. If you haven't look at them yet, you'll be getting the | This walkthrough hasn't yet addressed the two Blueprints you earned since the Woodcutters' Camp for your last two Orders. If you haven't look at them yet, you'll be getting the [[Shelter]] and the {{bl|Small Foragers' Camp}}. | ||
The tutorial hasn't required you to build the Shelter yet. It's simple building that meets the [[ | The tutorial hasn't required you to build the Shelter yet. It's simple building that meets the [[Housing_Need|needs of your villagers for Shelter]]. This walkthrough hasn't discussed villager needs yet, but for now, all you need to know is that shelter and food are basic needs that your villagers expect you to provide. You can place a Shelter if you'd like, but this guide won't go into that now. | ||
| Line 585: | Line 581: | ||
{{Walkthrough_step|Pick the remaining two Blueprints. The | {{Walkthrough_step|Pick the remaining two Blueprints. The [[Shelter]] and {{bl|Small Foragers' Camp}} will now be available in your construction toolbar.}} | ||
{{Walkthrough_info|The Shelter appears under the Housing button in the construction toolbar, the one that looks like a house. This button was greyed out until you got a new Blueprint for that category of building.}} | {{Walkthrough_info|The Shelter appears under the Housing button in the construction toolbar, the one that looks like a house. This button was greyed out until you got a new Blueprint for that category of building.}} | ||
=== 6. Foragers' Camp === | === 6. Foragers' Camp === | ||
| Line 840: | Line 834: | ||
In the tutorial, you are offered these two Cornerstones, Exploration Contract and Carpenter's Tools. The first gives you 20 {{rl| | In the tutorial, you are offered these two Cornerstones, Exploration Contract and Carpenter's Tools. The first gives you 20 {{rl|Reed}} and 20 {{rl|Clay}} every time you open a new Glade. The second improves production speed in a building you haven't seen yet called the {{bl|Crude Workstation}}. You can choose whichever you like. | ||
| Line 893: | Line 887: | ||
{{Walkthrough_blockquote|Building Blocks}} | {{Walkthrough_blockquote|Building Blocks}} | ||
Now it's time to put all that {{rl|Wood}}, {{rl|Clay}}, and {{rl|Plant | Now it's time to put all that {{rl|Wood}}, {{rl|Clay}}, and {{rl|Plant Fiber}} that we've been gathering to good use. The {{bl|Crude Workstation}} is your first industry building. Industry buildings take raw materials, crafting materials, and sometimes food to make more advanced goods used to advance your village. The Crude Workstation is the first of these because its products are used to build all the industry buildings and other advanced buildings your settlement needs. | ||
Once you build one, we can talk about production in buildings and how it's different from camps. For now, here are your updated objectives: | Once you build one, we can talk about production in buildings and how it's different from camps. For now, here are your updated objectives: | ||
| Line 929: | Line 923: | ||
When you go to place the Crude Workstation, you'll see right away it doesn't have a range like the camps. Instead, it shows white dotted lines traveling between nearby buildings and the workstation. These lines show where the workers assigned to the Crude Workstation can go to pick up the ingredients needed to make products at the workstation. They will go to the closest building that has what they need. If no close buildings have the ingredients, or if there are no close buildings, then the workers will go to the | When you go to place the Crude Workstation, you'll see right away it doesn't have a range like the camps. Instead, it shows white dotted lines traveling between nearby buildings and the workstation. These lines show where the workers assigned to the Crude Workstation can go to pick up the ingredients needed to make products at the workstation. They will go to the closest building that has what they need. If no close buildings have the ingredients, or if there are no close buildings, then the workers will go to the [[Main Warehouse]], regardless of how far away the warehouse is. (You can see this by moving around the map before placing the workstation; one white dotted line will always show the connection between the workstation and the warehouse.) If the village has none of the needed ingredients, then work will stop in the building while they wait for the settlement to obtain the ingredients they need. | ||
This behavior with ingredients is the same for all buildings that produce things with ingredients (vs. gathering camps). More on that in a minute. For now, don't worry too much about optimizing where to put the workstation, anywhere near the center of your village is fine. | This behavior with ingredients is the same for all buildings that produce things with ingredients (vs. gathering camps). More on that in a minute. For now, don't worry too much about optimizing where to put the workstation, anywhere near the center of your village is fine. | ||
| Line 995: | Line 989: | ||
When you deliver the Order, you receive a perk that adds 50% to the amount of goods produced in the Crude Workstation. Originally, the Crude Workstation's recipes produced 2 {{rl|Planks}}, {{rl|Fabric}}, or {{rl|Bricks}}. Now, you'll see that the recipes produce 3 of each, making the zero-star Crude Workstation much more efficient. This will come in handy for the next Order. | When you deliver the Order, you receive a perk that adds 50% to the amount of goods produced in the Crude Workstation. Originally, the Crude Workstation's recipes produced 2 {{rl|Planks}}, {{rl|Fabric}}, or {{rl|Bricks}}. Now, you'll see that the recipes produce 3 of each, making the zero-star Crude Workstation much more efficient. This will come in handy for the next Order. | ||
The next and final Order of this tutorial mission arrives upon delivery of the building materials. You are to finish exploring the forest by opening one [[ | The next and final Order of this tutorial mission arrives upon delivery of the building materials. You are to finish exploring the forest by opening one Dangerous [[Glade]] and retrieving an {{rl|Ancient Tablet}} from the Ancient Shrine in it. Those instructions will make more sense once we get the Glade open. Start with that, because by now, you know the steps to direct your woodcutters to open Glades. Look around at the Glades to find the one with the skull icon. | ||
[[File:Walkthrough-1-21-b-dangerous glade.png|400px]] | [[File:Walkthrough-1-21-b-dangerous glade.png|400px]] | ||
| Line 1,023: | Line 1,017: | ||
{{Walkthrough_info|The last Blueprint you receive is your choice of one from among the species-specific houses. The | {{Walkthrough_info|The last Blueprint you receive is your choice of one from among the species-specific houses. The [[Human House]], [[Beaver House]], or [[Lizard House]] are all similar to the [[Shelter]], but only house villagers of that species. They are much more expensive and also only house 2 villagers instead of 3. However, villagers get a bonus to their Resolve when they are housed in their species-specific houses.}} | ||
{{Walkthrough_advice|When you have an objective like this that you need to meet, it's important to double-check that the Woodcutters' Camp can reach the trees you need to cut down. Remember that marked trees are highlighted yellow if they are in range and grey if they are not in range. The highlight color pulses slowly, so if you are having trouble seeing your marked trees try unpausing the game for two seconds to see if the highlight intensifies.}} | {{Walkthrough_advice|When you have an objective like this that you need to meet, it's important to double-check that the Woodcutters' Camp can reach the trees you need to cut down. Remember that marked trees are highlighted yellow if they are in range and grey if they are not in range. The highlight color pulses slowly, so if you are having trouble seeing your marked trees try unpausing the game for two seconds to see if the highlight intensifies.}} | ||
=== 17. The Glade Event === | === 17. The Glade Event === | ||
| Line 1,233: | Line 1,225: | ||
* {{bl|Harvesters' Camp}} | * {{bl|Harvesters' Camp}} | ||
* {{bl|Crude Workstation}} | * {{bl|Crude Workstation}} | ||
* | * [[Small Hearth]] | ||
* | * [[Warehouse]] | ||
* | * [[Trading Post]] | ||
* | * [[Farm Field]] | ||
Clicking ''Continue'' starts the second tutorial mission. | Clicking ''Continue'' starts the second tutorial mission. | ||
| Line 1,253: | Line 1,245: | ||
The third objective to keep the fire going was not given any additional instruction in the tutorial or before this in the guide. You may have come across the issue when managing your workers. | The third objective to keep the fire going was not given any additional instruction in the tutorial or before this in the guide. You may have come across the issue when managing your workers. | ||
There is a worker at the | There is a worker at the [[Ancient Hearth]], at the center of your settlement, who delivers fuel when needed to keep the fire going in the Hearth. If you felt limited on workers, you may have removed the worker from the Hearth to reassign them. If they were unassigned for long enough, the fire may have gone out. When the fire goes out, villagers immediately experience a huge penalty to their Resolve. As long as you kept the fire going, with a worker assigned to the Hearth, and had fuel, you shouldn't have experienced much difficulty with the tutorial. If nothing else, ''Keep the fire going'' was a reminder that settlements are fragile, and things can go wrong quickly in Against the Storm! | ||
| Line 1,287: | Line 1,279: | ||
* Deeds and achievements | * Deeds and achievements | ||
[[Category: | |||
[[Category:Guides]] | |||
[[Category:Screenshots]] | [[Category:Screenshots]] | ||
Latest revision as of 13:58, 31 October 2024
Welcome, new player!
In response to recent posts on social media expressing confusion during the tutorial, we put together this walkthrough guide. This guide is intended to be followed along while you click through the tutorial missions. Besides reminding you of your instructions and objectives, this guide will provide as much clarity as possible about what is happening and expected—and occasionally include further explanation when it helps explain why something is happening or expected.
If you're feeling even a little confused or not following along why certain things are happening (or not happening), this guide attempts to answer those questions.
If you are familiar with some things but not others, skip around using this wiki article's table of contents.
Note for players already familiar with core game mechanics: This guide does not go into strategy or optimizations. Such information is contained on pages throughout the wiki. Certain things will be omitted here for the sake of clarity about core concepts, so you are encouraged to use this page until you understand the basics, then move on to other pages in this wiki.
For the most part, things will be explained here in this article, without making you click around this wiki. However, plenty of links are provided, should you wish you explore.
Starting the tutorial
This screen greets you when you load the game for the first time. There may be popups about upcoming or recent patch notes, "What's New," etc.. Feel free to ignore these until you become acquainted with the mechanics.
![]()
Click Play on the left to start the tutorial. A loading screen will show up, and the intro video will play.
| The world is plagued by the Blightstorm - a vile cycle of destruction ravaging everything in its path. The only safe haven is the Smoldering City, where the mysterious Scorched Queen reigns. | You are one of her viceroys - a pioneer sent into the wilds, tasked with with establishing new settlements and acquiring valuable resources for the crown. | Your goal is to help rebuild the Smoldering City, and secure the future of the Queens' subjects. |
Orientation
The first part of the tutorial orients you to four core mechanics:
- moving the camera around your town
- winning and losing the game
- blueprints for buildings
- pausing and unpausing the game
The Queen's Envoy is your in-game guide, providing you with instructions on how to complete the tutorial. This character does not play a major role in the game besides the tutorial.
Camera controls
Use [W, A, S, D] or the mouse to move the camera.
The first step is knowing how to look around. In Against the Storm, you can move the camera forward, backward, left, and right to look around your settlement. Right now, you can see all your villagers and buildings, but you'll need to look around into the forest to plan where to expand.
![]()
Press W, A, S, and D to move the camera forward, left, backward, and right. The tutorial box will disappear, and a new UI element will appear in the bottom right.
![]()
You can also move the camera by moving the mouse cursor to the edges of the screen, which will push the camera in that direction. The third way to move the camera is to hold the right mouse button and drag in the direction you wish to move. Press H to recenter the camera to the village center.
![]()
You can zoom the camera out or in with the mouse wheel.
![]()
You can also orbit the camera around the center of the screen, to look at your town from a different angle. Press H to recenter and reorient the camera to the village center.
![]()
You can customize the camera controls in the game options. Press Esc to open the in-game menu, click Options, and click the Key Bindings tab at the top.
The Queen's Impatience and losing the game
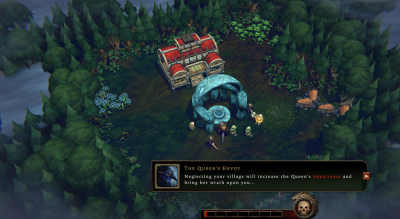
Neglecting your village will increase the Queen's Impatience and bring her wrath upon you ...
The tutorial introduces the Queen's Impatience, represented by a bar on the bottom right of your screen. This bar fills up with a bright red color, from left to right towards the skull icon. The bar fills gradually during the course of the game. When the bar fills up completely, you run out of time, lose, and cannot continue playing the town. You will have to start a new town.
Most of the time, the value of the Queen's Impatience simply increases at a slow and steady rate. However, some mechanics cause a large immediate penalty, like making the bar jump up by +1 points instantly because you didn't finish an objective in time. There are also ways to subtract points from the Impatience bar, thereby adding time to finish the mission. Finally, the rate of increase can speed up or slow down based on your decisions and random events.
![]()
Click the arrow to continue. The tutorial box will disappear, and a new UI element will appear to the left of the Queen's Impatience.
![]()
You can see the current value (0) and the rate (+0.15 per minute) at which the Queen's Impatience is increasing. Hold your mouse cursor over the Impatience bar or the skull icon.
![]()
The Queen's Impatience does not increase while the game is paused. Since the tutorial starts paused, the bar is not filling up yet.
Reputation and winning the game
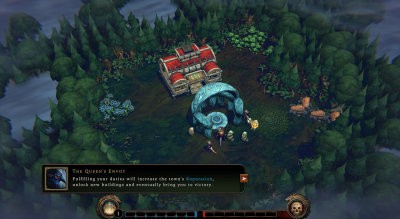
Fulfilling your duties will increase the town's Reputation, unlock new buildings and eventually bring you to victory.
Next, the tutorial introduces Reputation, a bar representing your progress towards winning the mission. This bar fills up blue, from right to left towards the crown icon. Your town gains Reputation when you complete town objectives, make decisions that reward Reputation points, and when your villagers are especially satisfied.
Whenever you gain a full point of Reputation, the Queen's Impatience also decreases by one point.
Unlike the Queen's Impatience, Reputation does not gradually increase at the beginning of each mission. Rather, after you have made some progress building the town and met specific conditions, your town starts to gain Reputation points gradually. This means that you can run out of time and lose the game before you gain any Reputation points.
If the Reputation bar fills up before the Queen's Impatience bar, you win the mission.
If Impatience fills up before Reputation, you lose the mission.
![]()
Click the arrow to continue. The tutorial box will disappear, and the crown icon will start glowing.
![]()
You can see the current value (0.0) of your town's Reputation. Hold your mouse cursor over the Reputation bar or the crown icon.
![]()
You can never lose reputation.
Blueprints
Now, choose a new blueprint. Click on the crown icon below.
Next up, you are given your town's first Blueprint.
A Blueprint is the ability to place a Building in your town. Most of the buildings in Against the Storm require you to have the Blueprint before you can build it in each town. For example, before you can place a Small Farm in a new town, your town must get the Blueprint for the Small Farm.
There are several ways to get Blueprints. When you earn the choice of a new Blueprint, the tutorial is showing you how to choose it.
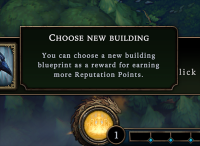
You can choose a new building blueprint as a reward for earning more Reputation Points.
You get to choose Blueprints at the beginning of a new town. The tooltip on the glowing Reputation icon is telling you that you can earn more Blueprints once you gain more Reputation. Do you notice the small blue pips at the base of each line on the Reputation bar in the screenshot? Those are the Reputation milestones. When your town's Reputation reaches each milestone, you earn one more Blueprint.
![]()
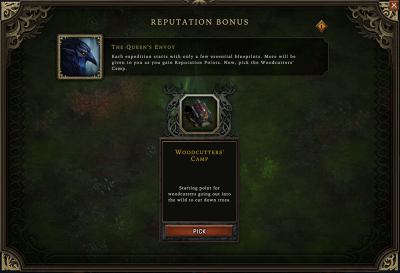
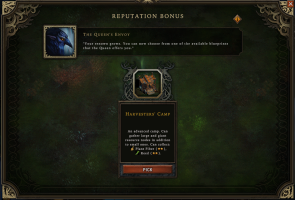
Click the crown icon. A large panel labeled Reputation Bonus opens.
Choosing your first Blueprint
Each expedition starts with only a few essential blueprints. More will be given to you as you gain Reputation Points. Now, pick the Woodcutters' Camp.
First things first. During the tutorial, you don't have any choices; the tutorial tells you which Blueprint you get next. In regular missions, when you earn the choice of a new Blueprint, you will get to choose from a few options.
Blueprint choice is one of the core mechanics of Against the Storm. You cannot expect to get the Blueprints for every building—not even close. In fact, you may never get to choose a Blueprint that you think you need for a village. Every mission must adapt to the Blueprints choices you are given.
After the tutorial, when you start playing regular missions, you will get three free Blueprints at the beginning of every mission. You will only have access to a few buildings, so you may see repeated options. For example, for your first Blueprint, you may be given the options of the Herb Garden, Plantation, or Herbalists' Camp. After you pick one, like the Herbalists' Camp, then you'll get three new options for your second Blueprint from which you can choose one, and the Herb Garden may appear again.
![]()
Click Pick to choose the Blueprint for the Woodcutters' Camp. The big panel will close so you can see your village again.
![]()
After the tutorial, every town starts with the ability to build the Woodcutters' Camp and a few other camps without having to spend Blueprint choices on them.
![]()
You may see options for Blueprints appear more than once for a town. However, the game will never waste one of your options on a Blueprint that you already have.
Unpausing and time controls
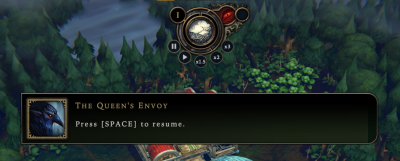
Press [SPACE] to resume.
Pausing and unpausing may be the game control you use the most often. When the tutorial started, the game was paused. The villagers were still, Impatience was not increasing, and nothing in the game world was getting better or worse. When the game is paused, you are free to take as much time as you need to plan, look through your town and the forest, make decisions, and step away from your computer.
![]()
Press the Spacebar to unpause the game. The tutorial message will disappear, the rain will start falling, and your villagers might start moving.
There is a lot going on in the time displays and controls. Feel free to hover the elements and read the tooltips about them, but for this guide we'll focus on them as things come up, so that you have the right context for understanding why each one is important.
The time controls let you pause, unpause, speed up, and slow down the game speed. These affect everything that happens in the world. If the game is sped up, everything happens faster relative to real-world time, with no exceptions. Timers on objectives, villagers' walking and working speeds, and how often villagers eat and rest are all proportionally sped up or slowed down so that there is no in-game advantage to playing the game faster or slower. It's up to your personal preference, and regardless of how fast the game time goes, you'll still find yourself pausing and unpausing frequently.
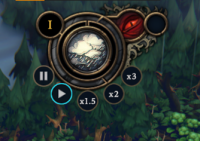
The controls are, from left to right, as you might expect:
- Pause
- Play (normal speed)
- x1.5 game speed
- x2 game speed
- x3 game speed
![]()
You can adjust the game speed with the keyboard instead of clicking on the control buttons. The keys are in the same order as the buttons on the screen: Press 1 for normal speed, 2 for x1.5 speed, 3 for x2 speed, and 4 for x3 speed.
![]()
Unpausing with the Spacebar takes the game speed back to whatever speed was most recently chosen before the game was paused.
First Tutorial Mission: Orders, Gathering, and Glades
The first mission demonstrates the following core mechanics:
- earning Blueprints
- the contruction toolbar
- building placement, including suitable ground and gathering range
- building materials and construction progress
- workers
- receiving Orders
- delivering Orders
- marking trees for harvesting
- opening glades
- gathering resources
- newcomers
- the Storm
- choosing Cornerstones
Building a Woodcutters' Camp
Build a Woodcutters' Camp and explore the forest. You have to keep the fire going at all times.
If you dismissed the tutorial message by trying to pause the game again, don't worry, that's why this guide has screenshots. You can pause the game at any time.
When you unpaused the game, you saw the rain, villagers, fire, and the fog in the forest start to move.
![]()
Click the arrow or press the Spacebar to dismiss the tutorial message. Several new UI elements will appear at the top, bottom, and sides of the screen.
Now the game screen looks mostly how it will look in regular missions. The tutorial will explain most of these things soon. For now, the tutorial gave you three objectives.
![]()
New objectives:
1. Build a Woodcutters' Camp.
2. Explore the forest.
3. Keep the fire going.
1. Placing the camp
Camps
You construct buildings with the buttons at the bottom of the screen, just above the Reputation bar. The button that the tutorial highlights for you is the one for constructing camps. Camps are the cheap, inefficient, yet essential buildings that almost every town uses to get started.
Your only available camp right now is the Woodcutters' Camp, since you just earned that Blueprint.
![]()
![]()
After the tutorial, every town starts with the ability to build the Woodcutters' Camp and a few other camps without having to spend Blueprint choices on them.
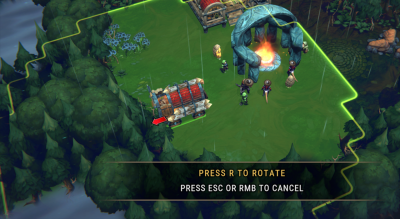
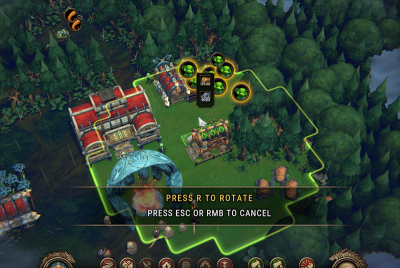
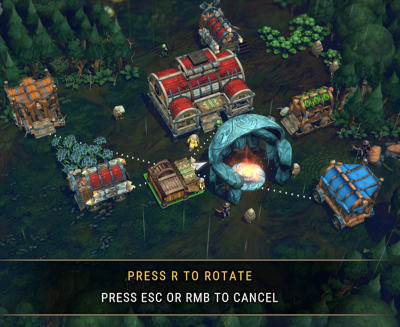
Press R to rotate
Press ESC or RMB to cancel
The camp has a footprint of 2x2 squares, and you will need to place it on suitable ground. The ground squares will highlight red underneath the mouse cursor wherever the building cannot be placed.
The large, circular green highlighting around the building is the gathering range. Any trees within the green range can be reached by this camp.
![]()
3. Click the ground where you want the building to be placed. The building's scaffolding will drop under the ghost.
![]()
You can rotate the building so that it faces the closest trees. Press R to rotate the building counter-clockwise.
![]()
After placing the camp, the ghost of the camp will stay on your mouse cursor in case you want to place a second camp. Press ESC or right-click to cancel placement.
![]()
You can read more about the Woodcutters' Camp in the in-game Encyclopedia. Right-click on the camp icon before constructing it.
![]()
If you have already marked trees for cutting, you will see the trees' highlighting change from grey to yellow when they are in range of the Woodcutters' Camp. Without any marked trees, only the ground is highlighted to show the camp's range.
2. Construction by villagers
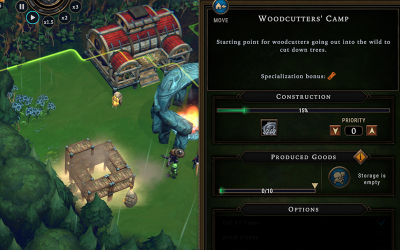
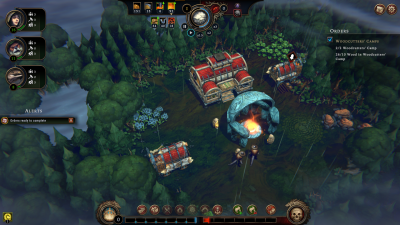
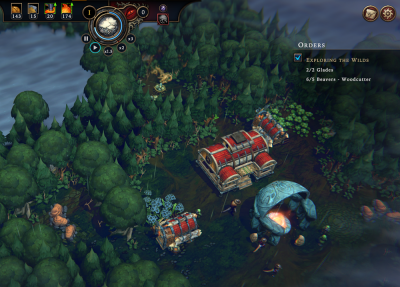
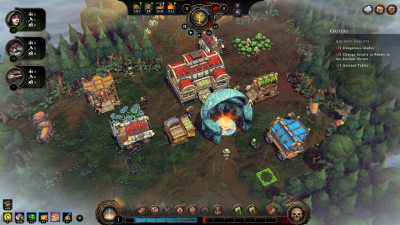
Once you unpause the game, the camp will be constructed by your villagers. None of your 9 villagers has any work, so they will automatically build for you. You do not need to tell any of them to do it. (In fact, you cannot issue commands to villagers in Against the Storm.)
One villager will first need to go to the big red building, the Main Warehouse. They will pick up the 2 ![]() Parts that are required to build the Woodcutters' Camp. That villager will carry the Parts to the scaffolding then start construction.
Parts that are required to build the Woodcutters' Camp. That villager will carry the Parts to the scaffolding then start construction.
![]()
Unpause the game. After a while, your villagers will finish the camp's construction.
![]()
Once a building's scaffolding contains all the required materials, villagers can start construction. In the case of the Woodcutters' Camp that only requires the 2 Parts, once the one villager returns with the Parts, other villagers can join in to make construction go faster.
3. Assigning workers
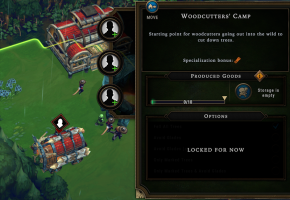
The camp is finished. There's a red, black, and white warning icon above the camp that looks like a person's head, because the camp needs workers. No trees will be cut or wood gathered until there are workers at the camp.
There are times when you will want to have no workers in a building, but this is not that time. If you haven't already, click on the Woodcutters' Camp to open its building panel.
You have 9 villagers doing nothing right now. You might as well put to work as many as possible.
![]()
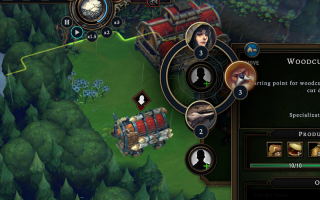
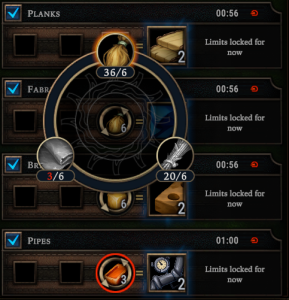
Clicking the first empty (black and white) worker icon in the building, and click one of the villager species from the radial menu. The species portrait will take over the empty worker slot.
![]()
Beavers are the best option for the Woodcutters' Camp because of the camp's Specialization Bonus, ![]() Woodworking. Beavers have this Specialization, so they get a small chance of gathering bonus wood from trees.
Woodworking. Beavers have this Specialization, so they get a small chance of gathering bonus wood from trees.
![]()
You may place a second Woodcutters' Camp at this time if you wish. You might place it somewhere else to get different trees cut down or near the first to get those nearby trees cut down faster.
Your First Orders
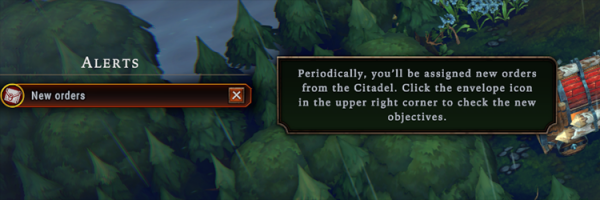
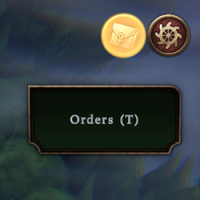
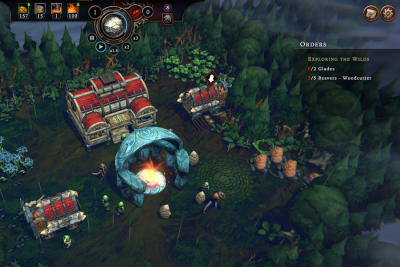
Periodically, you'll be assigned new orders from the Citadel. Click the envelope icon in the upper right corner to check the new objectives.
By now, you've seen the New Orders alert on the left side of your screen, and you've probably seen the glowing button in the top-right corner. They both mention Orders.
Completing Orders is a reliable and efficient method of gaining Reputation and advancing your town. In the tutorial, Orders represent the chapters in which new concepts are introduced, and they summarize the requirements for completing the tutorial.
When you open the Orders screen, the game automatically pauses.
![]()
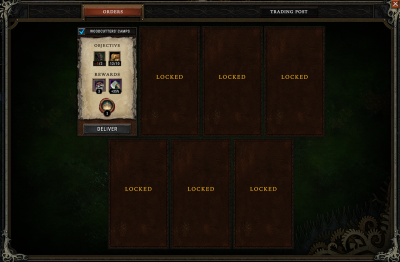
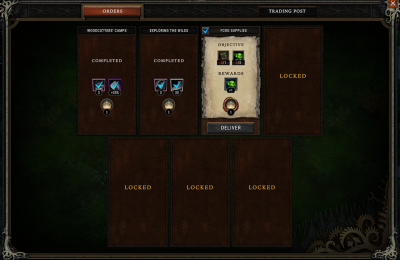
Click the Orders button in the top-right corner of your screen, and a large Orders panel will take over the screen.
![]()
You may unpause the game while the Orders panel is up. This is helpful if you know your town needs just a few more seconds to complete the objectives.
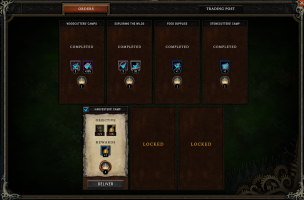
1. Objectives and rewards in Orders
Woodcutters' Camps
Similar to Blueprints, in a regular mission, you get to choose from a few options for your Orders. During the tutorial, you are given the Orders. And, like having your choice of Blueprints, being able to choose your Orders from random options is a core mechanic of Against the Storm. Every mission must adapt to the Order choices you are given.
Review the objectives. You must have two Woodcutters' Camps built, and they must collect 10 ![]() Wood. You may have noticed that your town started with some Wood; the Wood you started with does not count towards this objective. Your camp(s) must gather 10 new Wood.
Wood. You may have noticed that your town started with some Wood; the Wood you started with does not count towards this objective. Your camp(s) must gather 10 new Wood.
When you deliver this Order, your town will receive three rewards.
- A group of 3 new Beavers will join your settlement.
- You will gain a Perk called No perk found with that id: Reinforced Axes. that increases the speed of gathering Wood in the camp.
- Your town will gain 1 Reputation Point.
![]()
You have new objectives:
1. a. Build two Woodcutters' Camps.
1.b. Gather 10 ![]() Wood with your camps.
Wood with your camps.
2. Explore the forest.
3. Keep the fire going.
![]()
Click the close button at the top right of the screen or click outside of the panel. The Orders panel will close so you can see your village again. The new Order will appear in the tracker on the right edge of your screen.
2. Another camp and gathering wood
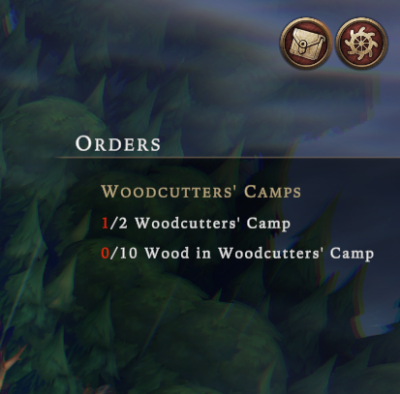
Woodcutters' Camps
1/2 Woodcutters' Camp
0/10 Wood in Woodcutters' Camp
It will take a minute before your villagers finish constructing the second camp and before woodcutters will gather the Wood you need to complete the Order. Since unassigned villagers build and assigned woodcutters gather, these two things can happen at the same time.
![]()
1. Place another Woodcutters' Camp.
2. Wait until the camp's construction finishes and your woodcutters gather enough Wood. The red numbers in the Order tracker will turn white, indicating when the objective requirements are satisfied.
![]()
You can make a copy of any building you have placed. Hold the mouse over your Woodcutters' Camp and press the Shift key. This has the same effect as opening the construction menu for camps and clicking on the Woodcutters' Camp icon. You still have to assign workers after it's built.
![]()
Keep the workers in your Woodcutters Camp going. You have plenty of villagers to keep the camp fully staffed, and it will reduce your waiting time during the tutorial.
![]()
When your town gains Reputation, it may be enough to be given the choice of a new Blueprint. During this mission, this is always the case. Therefore, delivering this Order rewards you with a Reputation Point and a new Blueprint.
3. Delivering your first Order
Orders ready to complete
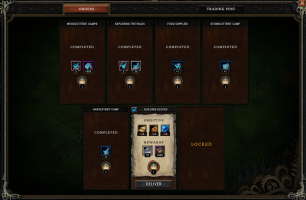
After you build your second camp and your woodcutters gather enough wood, the Order will be ready for delivery. A blue checkmark appears next to Orders that are ready to deliver.
This particular order requires you to gather Wood, so when you deliver the Order, you won't actually be losing 10 Wood from your town. In regular missions, Orders often require you to give up goods to complete the Order. Be sure to read Orders carefully.
![]()
Click the blue checkmark to deliver the Order. That Order will disapper from the Order tracking overlay, and you will instantly receive the rewards: 3 Beavers, woodcutting Perk, and 1 Reputation Point.
![]()
You can also deliver the Order from the Orders screen. Click the Orders icon in the top right to open the Orders panel. When the Order is ready, the Order will glow orange and the Deliver button will be enabled.
![]()
You can preview and compare rewards without going to the Orders panel. Hold the mouse over the blue checkmark without clicking. A preview of the rewards will appear.
![]()
You can see which Perks your town has gained in the bottom left corner of the screen. Hold your mouse over the new purple axe icon to see the description of the Perk with which you were just rewarded.
![]()
When you gain a Reputation point, for example when delivering an Order, you also lose one point of the Queen's Impatience. However, Impatience cannot drop below zero.
![]()
In regular missions, you may have more than one Order that require the same goods. When you deliver one, the second Order may no longer be ready to complete if you no longer have the goods to deliver.
Exploring the Forest
Mark trees for harvest
A few things happened when you delivered the Order:
- Your town gained 1 Reputation point.
- You lost a point of the Queen's Impatience (or brought it down to zero).
- Achieving the Reputation milestone rewarded you with a new Blueprint to unlock.
- A new Order became available.
- You got an alert to Mark trees for harvest.
Recall your objectives:
![]()
You have new objectives:
1 a. Build two Woodcutters' Camps.
Gather 10 ![]() Wood with your camps. with your camps.
Wood with your camps. with your camps.
2. Explore the forest.
3. Keep the fire going.
You explore The Forest by cutting trees. Your woodcutters clear trees to make buildable space and usable ![]() Wood to use in your town.
Wood to use in your town.
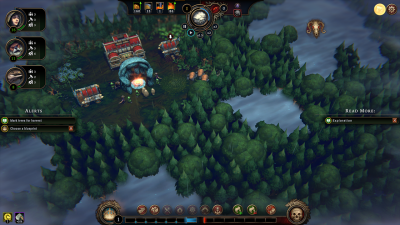
If you haven't already, pause the game and take a minute to scroll around and look at the forest surrounding your village. It's a small area for the tutorial, but it's not completely full of trees. There are Glades in the forest, which are small (and some large) clearings or open spaces. Every Glade holds a random assortment of the following, depending on its size:
- resource deposits from which your villagers can gather
- fertile soil for farming
- encampments of lost villagers you can add to your population
- ruined buildings you can repair and use or salvage for resources
- Glade Events, which present you with timed objectives, penalties, and rewards
- and more
The rewards that come from Glades and Glade Events are one of the primary ways of advancing your town. Most Orders will push you out of the comfort zone of your starting area, whether by explicitly requiring you to open new Glades or by requiring you to use resources you don't currently have access to. Many Glade Events can also reward Reputation directly in addition to any Orders they help you satisfy, making them count twice.
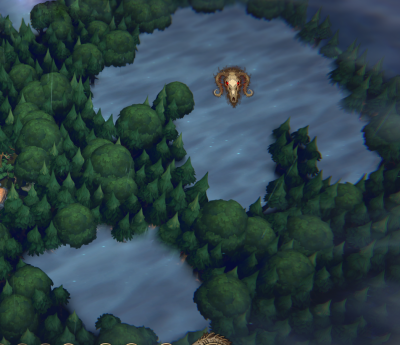
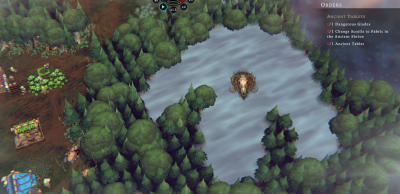
In Against the Storm, the defining characteristic of Glades is not their size, but whether or not they have a skull icon above them. Dangerous Glades have a skull above them; Small Glades do not. Therefore, as you look around the forest, you'll see that most of the Glades on the map are Small Glades. And there is one Dangerous Glade.
1. Second Order: More workers and opening Glades
![]()
1. Click the Orders button in the top right. The Orders panel opens.
2. Review your new Order, Exploring the Wilds, then close the Orders panel. The Orders overlay will remind you of your new objectives.
![]()
You have new objectives:
1 a. Build two Woodcutters' Camps.
Gather 10 ![]() Wood with your camps. with your camps.
Wood with your camps. with your camps.
2. Explore the forest.
2.a.i. Open 2 Glades.
2.a.ii. Have 5 Beavers assigned to be woodcutters at the same time.
3. Keep the fire going.
2. Assigning additional workers.
Occasionally, you'll be pleasantly surprised to see a new Order with objectives you've already or partially satisfied. In this case, you already had a Woodcutters' Camp with workers assigned. If you assigned any Beavers as those workers, based on intuition or following along on this guide, then you already have 3/5 of the objective. If not, it's as simple as a few clicks to reassign the workers to be Beavers instead of Humans or Lizards. Or you may have even assigned Beavers in your second Woodcutters' Camp too, which means you already have the second objective of this Order satisfied.
Almost every Order has multiple conditions to meet. In order to be able to deliver the Order, all conditions must be satisfied at the same time. This means that, until you've broken through the forest into two Glades, you don't have to have the Beavers assigned. However, to complete the tutorial faster, you'll want to assign all the workers you can to your two Woodcutters' Camps.
By the way, it's true the other way around, too. If you assign 5 Beavers now, it doesn't count until the second Glade has been opened. If you remove any Beavers from the camps between now and then, you won't be able to deliver the Order until you put them back.
![]()
Assign Beavers to the Woodcutters' Camps until you have at least 5.
![]()
The tutorial doesn't explicitly say this, but it is showing you that Beavers are the best option for the Woodcutters' Camp because of the camp's Specialization Bonus, ![]() Woodworking. Beavers have this Specialization, so they get a small chance of gathering extra resources from trees. Their worker portrait in the camp looks different from a Human's or Lizard's, with a spinning gear behind their portrait. This means they get that production bonus.
Woodworking. Beavers have this Specialization, so they get a small chance of gathering extra resources from trees. Their worker portrait in the camp looks different from a Human's or Lizard's, with a spinning gear behind their portrait. This means they get that production bonus.
3. Opening Glades
You get nothing from the Glades until your woodcutters open the Glades. When the last tree falls that was standing in between your explored area and the unexplored Glade, the fog vanishes and anything in the Glade becomes accessible. Any timers on objectives or penalties on Glade Events in the Glade start counting. We'll talk more about Glade Events later in this mission.
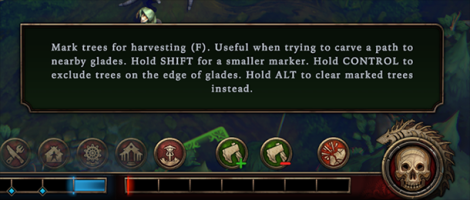
Your order requires you to open two new Glades. There's an alert on the left that says Mark trees for harvest. Clicking it highlights two icons in the construction toolbar. These icons are related to construction because they are how you clear space for new buildings.
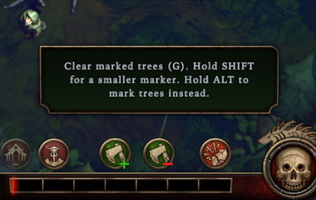
When you click the Mark Trees button, the axe icon with the green plus sign, your mouse cursor changes to a wide yellow circle. Clicking and dragging over trees will paint them with the mark for harvesting. Clicking the other axe icon or holding Alt changes the painting mode to unmarking trees. You may find yourself often flipping between the modes while marking trees.
If you mark trees that are within the range of any Woodcutters' Camp, their marking will appear yellow. If they are outside of all ranges of all Woodcutters' Camps, the marking will be grey. The marking will fade in and out, so if you find the marking hard to see while the game is paused, try unpausing for a second or two to let the marking intensify.
You could let your woodcutters clear cut the forest until they accidentally open two Glades to satisfy your Order. To progress through the tutorial faster, use the marking tool to focus the woodcutters on the trees that will get them to open the Glades.
![]()
Mark the trees in lines from your camps to the closest Glades. Your woodcutters will focus on those trees and open the Glades.
![]()
You can also paint with a smaller brush to mark smaller areas of trees while clicking and dragging the mouse. Hold the Shift key while painting to swap to the smaller brush size. You can also do this while holding Alt to swap the painting mode between marking and unmarking.
![]()
You can also prevent trees on the edges of Glades from being marked. Hold the Ctrl key while painting, and all trees that border Glades will not be marked, regardless of where the mouse cursor is. Use caution, as it is easy to accidentally let up the key before the mouse button, which can result in Glade-bordering trees being marked.
You can prevent border trees from being marked while holding Shift to paint with a smaller brush, too.
![]()
You can also move the Woodcutters' Camps closer to the Glades you want to open. Click the camp you wish to move, then find the blue icon in the top left of the building's panel. Moving camps does not cost your town any resources, is instant, but will make your workers restart any actions they are performing.
![]()
In the tutorial, woodcutters cut down all trees in range. In regular missions, you can control their behavior and how they handle marked trees. For example, you can make it so all camps will clear cut but never open any Glades—or at least not until you mark them.
4. Delivering the Order
Before long, your Order will be ready to deliver.
![]()
Deliver the Order. A group of 3 new Humans will join your settlement, you will receive 30 ![]() Meat, and you gain 1 Reputation point. And a new Order will show up immediately.
Meat, and you gain 1 Reputation point. And a new Order will show up immediately.
![]()
Remember that whenever you deliver an Order, you get +1 Reputation points, which takes away 1 point of the Queen's Impatience and in the tutorial always rewards you with a new Blueprint. In regular missions, you can time this reduction in Impatience to take the biggest effect of -1, if you can afford to wait to deliver it.
![]()
In regular missions, you will often want to plan to chain Orders together, so that ones you can finish earlier help you deliver later ones.
5. Third Order: Gathering food
Food Supplies
Your third Order requires you to use a new building to gather food from the forest. The tutorial village has access to ![]() Vegetables in the Moss Broccoli Patches near the Main Warehouse. But you can't do anything with this resource deposit until you have the right camp. Meanwhile, your food supplies have been dwindling, because the only thing your villagers have been gathering is
Vegetables in the Moss Broccoli Patches near the Main Warehouse. But you can't do anything with this resource deposit until you have the right camp. Meanwhile, your food supplies have been dwindling, because the only thing your villagers have been gathering is ![]() Wood, and Wood is not food. In the tutorial, you have plenty of food, but in regular missions, you need to establish a food supply quickly.
Wood, and Wood is not food. In the tutorial, you have plenty of food, but in regular missions, you need to establish a food supply quickly.
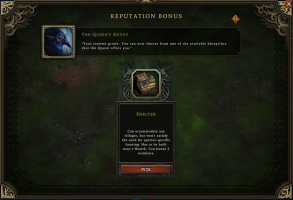
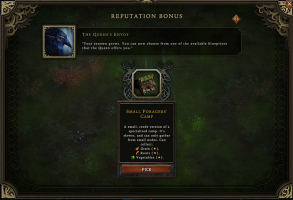
This walkthrough hasn't yet addressed the two Blueprints you earned since the Woodcutters' Camp for your last two Orders. If you haven't look at them yet, you'll be getting the Shelter and the Small Foragers' Camp.
The tutorial hasn't required you to build the Shelter yet. It's simple building that meets the needs of your villagers for Shelter. This walkthrough hasn't discussed villager needs yet, but for now, all you need to know is that shelter and food are basic needs that your villagers expect you to provide. You can place a Shelter if you'd like, but this guide won't go into that now.
![]()
Pick the remaining two Blueprints. The Shelter and Small Foragers' Camp will now be available in your construction toolbar.
![]()
The Shelter appears under the Housing button in the construction toolbar, the one that looks like a house. This button was greyed out until you got a new Blueprint for that category of building.
6. Foragers' Camp
Press R to Rotate
Press ESC or RMB to cancel
The Foragers' Camp behaves similarly to the Woodcutters' Camp. It has a range from which workers can gather. When you select a Foragers' Camp (whether by clicking on it in the construction panel or by clicking one placed in your village), in addition to the green highlighted area in range, you will also see resource icons appear on the screen. These icons hover over the resource deposits in the forest from which you can gather that resource. As you look around the forest with the camp selected, these icons will show you off-screen resources and help you place your camps within range of resources.
In the screenshot above, notice how one ![]() Vegetables deposit is out of range, so its icon does not have the same yellow, glowing highlight at the others. It's also not quite as big. Also note the
Vegetables deposit is out of range, so its icon does not have the same yellow, glowing highlight at the others. It's also not quite as big. Also note the ![]() Roots icons appearing in the top-left corner of the screenshot, well out of range of this camp.
Roots icons appearing in the top-left corner of the screenshot, well out of range of this camp.
![]()
You have new objectives:
1 a. Build two Woodcutters' Camps.
Gather 10 ![]() Wood with your camps. with your camps.
Wood with your camps. with your camps.
2. Explore the forest.
2.a.i. Open 2 Glades.
2.a.ii. Have 5 Beavers assigned to be woodcutters at the same time.
2.b.i. Build a Small Foragers' Camp.
2.b.ii. Gather 5 ![]() Vegetables in the new camp.
Vegetables in the new camp.
3. Keep the fire going.
![]()
Place a Foragers' Camp within range of the Vegetables. Villagers will come to build the camp.
![]()
You can move a Woodcutters' Camp out of the way of your ![]() Vegetables to get the Foragers' Camp closer. Hover your mouse over the Woodcutters' Camp and press the
Vegetables to get the Foragers' Camp closer. Hover your mouse over the Woodcutters' Camp and press the M key. The camp will attach itself to your mouse cursor.
![]()
When you are placing a Foragers' Camp, notice the tooltip showing the cost to build the camp. It costs both ![]() Wood and
Wood and ![]() Parts to build each Foragers' Camp. Go try to build a Woodcutters' Camp again and compare the tooltip. The Woodcutters' Camp only requires
Parts to build each Foragers' Camp. Go try to build a Woodcutters' Camp again and compare the tooltip. The Woodcutters' Camp only requires ![]() Parts. All the camps besides the Woodcutters' Camp require
Parts. All the camps besides the Woodcutters' Camp require ![]() Wood.
Wood.
7. Assigning Foragers
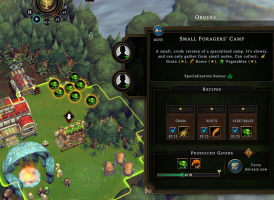
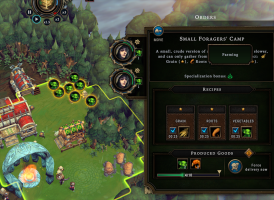
Just like the Woodcutters' Camp (and nearly every other building in the game), the Foragers' Camp needs workers. Which do we chooose? When you open the Foragers' Camp, it also has a Specialization Bonus, and it's ![]() Farming.
Farming.
![]()
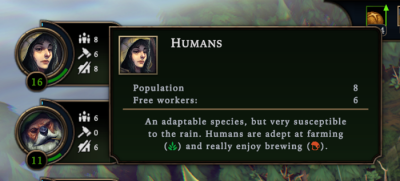
You can check the Specializations a species has by the tooltip from their portrait in the top-left corner of the game window. Which one has the ![]() Farming Specialization?
Farming Specialization?
Humans
An adaptable species, but very susceptible to the rain. Humans are adept at farming () and really enjoy brewing (
).
![]()
Assign workers to the Foragers' Camp. They will start to gather the ![]() Vegetables.
Vegetables.
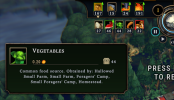
Vegetables
Common food source. Obtained by: Hallowed Small Farm, Small Farm, Foragers' Camp, Small Foragers' Camp, Homestead.
After a short while, you will see your food resources increase. At the top of your screen, you can see the resources summary panel. The first category, which looks like a loaf of bread, is your total food items. These are all of the resources that your villagers can eat. Note that, later in the game, you will come across resources that are ingredients for food but not actually edible as food, like ![]() Herbs. These goods are categorized as crafting materials instead of as food.
Herbs. These goods are categorized as crafting materials instead of as food.
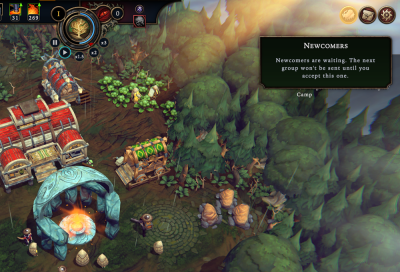
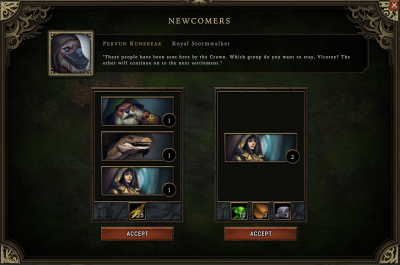
8. Newcomers
Newcomers
Newcomers are waiting. The next group won't be sent until you accept this one.
Around this time, you may find a new glowing icon appear in the top right of your screen after a clicking sort of sound. Newcomers have arrived in your village. So far, in this mission, you started with 9 villagers, then gained 3 Beavers and 3 Humans from delivering Orders. Newcomers arrive about once a year (more on Seasons later).
![]()
Click on the Newcomers icon in the top-right corner. The Newcomers screen will appear, and the game will pause.
Pervun Runebeak, Royal Stormwalker
These people have been sent here by the Crown. Which group do you want to stay, Viceroy? The other will continue on to the next settlement.
Like Blueprints and Orders, you are given a choice of (in the case of Newcomers) two groups of villagers who can join your village. In the screenshot above, you can see one choice has 1 villager of each species (3 total), and the other has two Humans. The first group brings a stack of 15 ![]() Grain, but the second brings three smaller stacks:
Grain, but the second brings three smaller stacks: ![]() Vegetables,
Vegetables, ![]() Leather, and
Leather, and ![]() Stone. Your options will differ; these choices are not fixed in the tutorial like the Blueprints and Orders.
Stone. Your options will differ; these choices are not fixed in the tutorial like the Blueprints and Orders.
Being able to choose from random options of newcomers—which species they are and what goods they bring with them—is another layer of variability that every mission must adapt to, like Blueprints and Orders.
At any given time, the best choice depends on what you need in your village right now and plan to need later. If you would prefer more food later, if you need another Beaver, or if you need as many villagers as possible, then you could pick the first one. If you need food now or need more Humans specifically, then the second one would be better. It depends.
![]()
Click Accept to choose a Newcomers group, and the screen will close.
![]()
If your tutorial gave you an option with ![]() Vegetables, they do not count towards the Order objective, since the Order requires
Vegetables, they do not count towards the Order objective, since the Order requires ![]() Vegetables to be gathered by the Foragers' Camp.
Vegetables to be gathered by the Foragers' Camp.
![]()
You can delay choosing the Newcomers group if you want to do so. It takes a specific amount of time for Newcomers to get from the Citadel to your settlement, and that timer doesn't start until you choose the Newcomers you have waiting now. This means that if you want to maximize your settlement's population during the mission, you want to welcome Newcomers as soon as they arrive, so the next group starts on their way as soon as possible.
![]()
A common reason to delay welcoming Newcomers is when a village lacks the food supply to feed a larger population.
9. Fourth Order: Gathering clay
Stonecutters' Camp
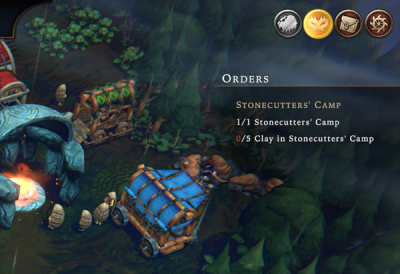
Just like last time, after you deliver your Order for gathering food, you get another Blueprint. And just like last time, your next Order requires you to use it. The Stonecutters' Camp works just like the others. When you go to place it, notice which resource icons appear on the map.
Stonecutters' Camp
0/1 Stonecutters' Camp
0/5 Clay in Stonecutters' Camp
The Stonecutters' Camp gathers ![]() Clay, which are the red-orange rock deposits near your village (and yellow cube resource icons when the camp is selected). Complete this Order just like you completed the Foragers' Camp Order.
Clay, which are the red-orange rock deposits near your village (and yellow cube resource icons when the camp is selected). Complete this Order just like you completed the Foragers' Camp Order.
![]()
You have new objectives:
1 a. Build two Woodcutters' Camps.
Gather 10 ![]() Wood with your camps. with your camps.
Wood with your camps. with your camps.
2. Explore the forest.
2.a.i. Open 2 Glades.
2.a.ii. Have 5 Beavers assigned to be woodcutters at the same time.
2.b.i. Build a Small Foragers' Camp.
2.b.ii. Gather 5 ![]() Vegetables in the new camp.
Vegetables in the new camp.
2.c.i. Build a Stonecutters' Camp.
2.c.ii. Gather 5 ![]() Clay in the new camp.
Clay in the new camp.
3. Keep the fire going.
![]()
1. Place a Stonecutters' Camp.
2. Wait for it to be built by any villagers who aren't assigned to buildings.
3. Assign workers to the new camp.
4. Wait for them to gather 5 Clay.
5. Deliver the Order.
![]()
![]()
There is one important difference in the Stonecutters' Camp's mechanics than the Woodcutters' and Foragers' Camps. It doesn't have a Specialization. Therefore, there is no advantage one species of villagers has over any of the others in the Stonecutters' Camp.
![]()
The Stonecutters' Camp, like the Woodcutters' Camp, comes in one size. On the other hand, the Foragers' Camp comes in a small size and then later after you play many cities you can get a regular size.
10. The first Storm
Around this time, or maybe a few minutes ago (that's fine too), the first Storm will start. Let's talk about Seasons. Every year of every mission, the world goes through 3 seasons: Drizzle, Clearance, and Storm. Each has different effects on your villages and purposes for your villagers.
 |
 |
 |
| Drizzle | Clearance | Storm |
| lasts 6:00 | lasts 4:15 | lasts 1:40 |
| beneficial effects | none | negative effects |
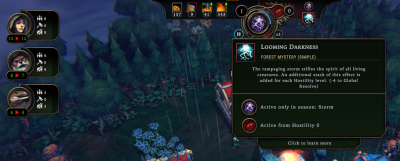
Looming Darkness
Forest Mystery (Simple)
The rampaging storm stifles the spirit of all living creatures. An additional stack of this effect is added for each Hostility level. (-4 to Global Resolve)
Active only in season: Storm
Active from Hostility 0
The mechanics and interactions of each Seasons are too involved for this guide. Right now, what you need to know is that during the Storm, your villagers lose Resolve. During the tutorial, it's not going to cause you problems. But it's important to point out that it is happening and the relationship between Resolve and the Storm.
Resolve is the green number under the species in the top left. It's a single number that represents the happiness of all the villagers of that species. Two numbers may be shown if the species' Resolve is increasing or descreasing, so that you can see how far it will go based on all of the current effects on that species. If Resolve drops to 0 or below 0, then that species will start to leave your settlement, one villager at a time. Every villager that leaves causes a penalty of the Queen's Impatience.
Resolve drops because of the Looming Darkness effect (called a Forest Mystery). This effect only occurs during the Storm. It causes -4 Resolve to every species, plus an additional -4 for every level of Hostility. Hostility is the number next to the red eye above the time controls. In the screenshot above, it's a zero, so Looming Darkness only causes -4 to Resolve this time. If Hostility raises to 1 during this Storm or before the next Storm, then Looming Darkness causes -8 to Resolve. That would be enough for the Lizards to be unhappy and start to leave.
The good news is that you have some control over Hostility. For now, in the tutorial, Hostility should be 0, and any Resolve loss should not cause any villagers to leave. Because of that, you don't need to worry about the Storm right now. In regular missions, you'll need to prepare for the Storm every year.
![]()
Resolve will be covered in more detail in the next tutorial mission.
![]()
You can see which year it is above the time controls, the number just above and to the left of the Season icon. In the screenshot above, it's I. The year number is written in Roman numerals, so it is not confused with Hostility levels, which are written in Arabic numerals.
![]()
You can browse around the in-game tooltips to learn more about the Storm, Resolve, Hostility, and Forest Mysteries (effects like Looming Darkness). Hover over the icons to read more about them. More icons and tooltips will be shown in the next tutorial mission.
11. Your first Cornerstone
After the Storm, it's now Year II and the Drizzle Season returns. At the beginning of every year (the start of every Drizzle season), you earn a new Cornerstone. Cornerstones are permanent effects you choose to help your village. There are a wide variety of effects; here are some examples:
- more effective production (bonus resources)
- faster production
- cheaper or faster building construction
- bonuses to Resolve
- reductions to Hostility
- reductions to the rate of increase of the Queen's Impatience
- changes to lengths of the Seasons
- help with Glade Events
- bigger groups of newcomers
- more efficient housing
- and many, many more
The Against the Storm pattern continues. Just like Blueprints, Orders, and Newcomers, you are given random options every time you get to choose a Cornerstone, and every mission must adapt to the options you are given and the choices you make.
As you play more missions, you'll start to recognize and be able to plan for powerful combinations and interactions of Blueprints, Orders, and Cornerstones.
![]()
Click the glowing Cornerstone icon in the top right. (The second one from the left, which looks like a mask, open hands, or wings. The Orders icon may be glowing at the same time.)
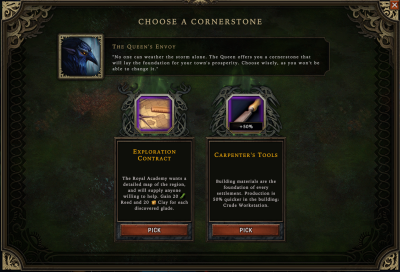
Choose Cornerstone
The Queen's Envoy
"No one can weather the storm alone. The Queen offers you a cornerstone that will lay the foundation for your town's prosperity. Choose wisely, as you won't be able to change it."
In the tutorial, you are offered these two Cornerstones, Exploration Contract and Carpenter's Tools. The first gives you 20 ![]() Reed and 20
Reed and 20 ![]() Clay every time you open a new Glade. The second improves production speed in a building you haven't seen yet called the Crude Workstation. You can choose whichever you like.
Clay every time you open a new Glade. The second improves production speed in a building you haven't seen yet called the Crude Workstation. You can choose whichever you like.
![]()
Click Pick under the Cornerstone you prefer. The Cornerstone screen will close. The icon for the cornerstone you chose will be added to the screen in the bottom left with your other perks.
12. Fifth Order: Gathering with the Harvesters' Camp
Harvesters' Camp
Another Order, and another camp Blueprint. The Harvesters' Camp lets your village gather plants that produce crafting materials that aren't used in food. Like the Stonecutters' Camp, the Harvesters' Camp comes in only one size. Note which resource icons appear when you go to place the camp to make sure the deposits of ![]() Plant Fiber are in range of the camp.
Plant Fiber are in range of the camp.
![]()
You have new objectives:
1 a. Build two Woodcutters' Camps.
Gather 10 ![]() Wood with your camps. with your camps.
Wood with your camps. with your camps.
2. Explore the forest.
2.a.i. Open 2 Glades.
2.a.ii. Have 5 Beavers assigned to be woodcutters at the same time.
2.b.i. Build a Small Foragers' Camp.
2.b.ii. Gather 5 ![]() Vegetables in the new camp.
Vegetables in the new camp.
2.c.i. Build a Stonecutters' Camp.
2.c.ii. Gather 5 ![]() Clay in the new camp.
Clay in the new camp.
2.d.i. Build a Harvesters' Camp.
2.d.ii. Gather 5 ![]() Plant Fiber in the new camp.
Plant Fiber in the new camp.
3. Keep the fire going.
![]()
1. Place a Harvesters' Camp.
2. Let the villagers build the new camp.
3. Assign workers to the new camp.
4. Gather 5 ![]() Plant Fiber.
Plant Fiber.
5. Deliver the Order.
![]()
![]()
Like the Stonecutters' Camp, the Harvesters' Camp has no Specialization.
![]()
If you built more than one Foragers' Camp or Stonecutters' Camp, you may be low on free workers. If a red and black hammer icon appears above the footprint of the Harvesters' Camp after you place it, it means you have no free workers and no one is available to build the camp. Free up a worker to be a builder; you'll need them to work the Harvesters' Camp anyway.
13: Sixth Order: Produce building materials
Building Blocks
Now it's time to put all that ![]() Wood,
Wood, ![]() Clay, and
Clay, and ![]() Plant Fiber that we've been gathering to good use. The Crude Workstation is your first industry building. Industry buildings take raw materials, crafting materials, and sometimes food to make more advanced goods used to advance your village. The Crude Workstation is the first of these because its products are used to build all the industry buildings and other advanced buildings your settlement needs.
Plant Fiber that we've been gathering to good use. The Crude Workstation is your first industry building. Industry buildings take raw materials, crafting materials, and sometimes food to make more advanced goods used to advance your village. The Crude Workstation is the first of these because its products are used to build all the industry buildings and other advanced buildings your settlement needs.
Once you build one, we can talk about production in buildings and how it's different from camps. For now, here are your updated objectives:
![]()
You have new objectives:
1 a. Build two Woodcutters' Camps.
Gather 10 ![]() Wood with your camps. with your camps.
Wood with your camps. with your camps.
2. Explore the forest.
2.a.i. Open 2 Glades.
2.a.ii. Have 5 Beavers assigned to be woodcutters at the same time.
2.b.i. Build a Small Foragers' Camp.
2.b.ii. Gather 5 ![]() Vegetables in the new camp.
Vegetables in the new camp.
2.c.i. Build a Stonecutters' Camp.
2.c.ii. Gather 5 ![]() Clay in the new camp.
Clay in the new camp.
2.d.i. Build a Harvesters' Camp.
2.d.ii. Gather 5 ![]() Plant Fiber in the new camp.
Plant Fiber in the new camp.
2.e.i. Build a Crude Workstation
2.e.ii. Produce 4 of each building material.
3. Keep the fire going.
![]()
1. Pick the Blueprint for the Crude Workstation.
2. Click the Industry Buildings icon in the construction toolbar.
3. Click the Crude Workstation icon. The ghost of the workstation will appear on your cursor.
![]()
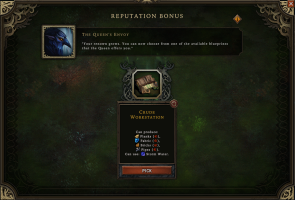
The Crude Workstation appears under the Industry button in the construction toolbar, next to the one for Housing. This button was greyed out until you got a new Blueprint for that category of building.
14. Placing the Crude Workstation
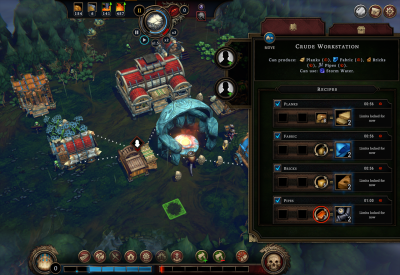
When you go to place the Crude Workstation, you'll see right away it doesn't have a range like the camps. Instead, it shows white dotted lines traveling between nearby buildings and the workstation. These lines show where the workers assigned to the Crude Workstation can go to pick up the ingredients needed to make products at the workstation. They will go to the closest building that has what they need. If no close buildings have the ingredients, or if there are no close buildings, then the workers will go to the Main Warehouse, regardless of how far away the warehouse is. (You can see this by moving around the map before placing the workstation; one white dotted line will always show the connection between the workstation and the warehouse.) If the village has none of the needed ingredients, then work will stop in the building while they wait for the settlement to obtain the ingredients they need.
This behavior with ingredients is the same for all buildings that produce things with ingredients (vs. gathering camps). More on that in a minute. For now, don't worry too much about optimizing where to put the workstation, anywhere near the center of your village is fine.
![]()
Build a Crude Workstation near the center of your village. The building panel will open.
![]()
If you built more than one Foragers' Camp, Stonecutters' Camp, or Harvesters' Camp, then you may be low on free workers. If a red and black hammer icon appears above the footprint of the Crude Workstation after you place it, it means you have no free workers and no one is available to build the workstation. Free up a worker to be a builder; you'll need them to work the workstation anyway.
15. Recipes and swappable ingredients
Crude Workstation
Can produce:Planks (☆),
Fabric (☆),
Bricks (☆),
Pipes (☆).
Can use:Storm Water.
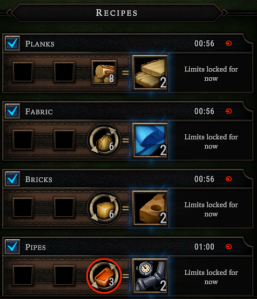
Because the Crude Workstation is not a gathering building, it uses a new primary Against the Storm mechanic, Recipes and Ingredients.
Recipes require ingredients (usually a small stack of one or two goods) and make products (usually a stack), and this happens only in buildings with the Recipes. Every production building in Against the Storm has a different, fixed set of Recipes; they are not random. You will start to remember which buildings give you access to which Recipes, and the tooltips will remind you.
Most Recipes have ingredients that can be swapped for other ingredients, which is a critical mechanic to recognize and use. This is shown by a thick, circular border with arrows around the ingredient icon. It is important you learn to recognize this symbol. Here is the Crude Workstation recipe panel for an example. In the recipe for ![]() Fabric and
Fabric and ![]() Bricks, note how the circular-arrow border around the ingredient icons for
Bricks, note how the circular-arrow border around the ingredient icons for ![]() Plant Fiber and
Plant Fiber and ![]() Clay looks different from the square border around the ingredient icon for
Clay looks different from the square border around the ingredient icon for ![]() Planks.
Planks.
![]()
On the wiki, when you can swap ingredients, you will see choices for the ingredients in the same cell of the tables, like this:
| Building | Grade | Ingredient | Product | |||||||
|---|---|---|---|---|---|---|---|---|---|---|
|
|
☆ 0:56 |
|
2 | |||||||
|
|
☆ 0:56 |
|
2 | |||||||
|
|
☆ 0:56 |
|
2 | |||||||
|
|
☆ 1:00 |
|
2 |
Next, besides the ingredients and the product, the Recipe also shows a red icon: ☆. This icons represents the efficiency of this Recipe in the Crude Workstation, which is very low, or zero stars. The efficiency or star-rating helps you quickly compare how long production takes and how many ingredients are consumed to make the product.
The same Recipe (![]() Wood for
Wood for ![]() Planks) has a different efficiency in other buildings. For example, in a building you don't have access to yet, the Carpenter, it's ★★ and only takes 5
Planks) has a different efficiency in other buildings. For example, in a building you don't have access to yet, the Carpenter, it's ★★ and only takes 5 ![]() Wood to make the same 2
Wood to make the same 2 ![]() Planks. Recipes in buildings can have zero stars (☆), one star (★), two stars (★★), or three stars (★★★).
Planks. Recipes in buildings can have zero stars (☆), one star (★), two stars (★★), or three stars (★★★).
![]()
Higher efficiency is always better. However, remember that having access to a Recipe in a low-efficiency building is better than having no access to that Recipe at all. Therefore, when choosing a Blueprint, sometimes getting a better version of a Recipe will be less important than getting access to a new Recipe.
If you took the Cornerstone for faster production speed in the Crude Workstation, then the production times in your Crude Workstation will be less than in the screenshot above. The workers you assign will produce each stack of products faster.
If you took Newcomers that brought ![]() Leather and
Leather and ![]() Stone, then you'll be able to finish the Building Blocks Order even if you haven't yet gathered enough
Stone, then you'll be able to finish the Building Blocks Order even if you haven't yet gathered enough ![]() Plant Fiber or
Plant Fiber or ![]() Clay. You will just need to swap to those or enable both ingredients.
Clay. You will just need to swap to those or enable both ingredients.
![]()
1. Assign workers to the Crude Workstation.
2. Enable the best ingredients for the workstation's Recipes.
3. Wait for your workers to produce enough products for your Order.
4. Deliver the Order.
![]()
We don't produce any Pipes in the tutorial.
16. Final Order
When you deliver the Order, you receive a perk that adds 50% to the amount of goods produced in the Crude Workstation. Originally, the Crude Workstation's recipes produced 2 ![]() Planks,
Planks, ![]() Fabric, or
Fabric, or ![]() Bricks. Now, you'll see that the recipes produce 3 of each, making the zero-star Crude Workstation much more efficient. This will come in handy for the next Order.
Bricks. Now, you'll see that the recipes produce 3 of each, making the zero-star Crude Workstation much more efficient. This will come in handy for the next Order.
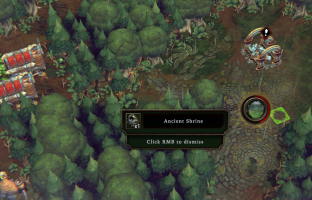
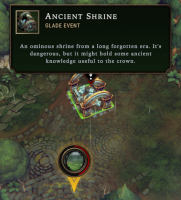
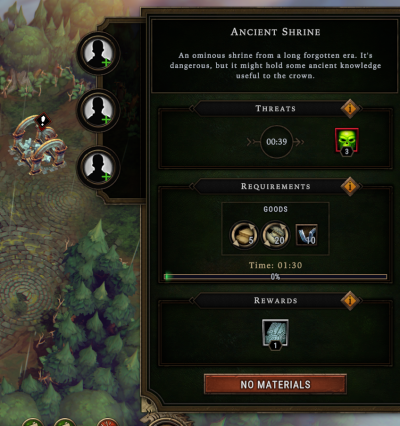
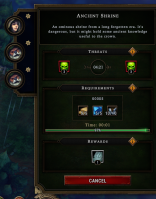
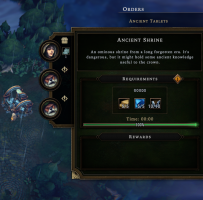
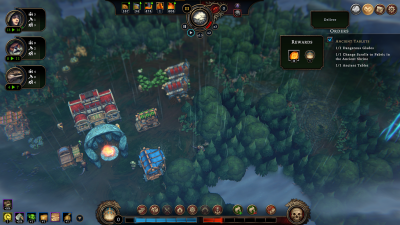
The next and final Order of this tutorial mission arrives upon delivery of the building materials. You are to finish exploring the forest by opening one Dangerous Glade and retrieving an ![]() Ancient Tablet from the Ancient Shrine in it. Those instructions will make more sense once we get the Glade open. Start with that, because by now, you know the steps to direct your woodcutters to open Glades. Look around at the Glades to find the one with the skull icon.
Ancient Tablet from the Ancient Shrine in it. Those instructions will make more sense once we get the Glade open. Start with that, because by now, you know the steps to direct your woodcutters to open Glades. Look around at the Glades to find the one with the skull icon.
![]()
You have new objectives:
1 a. Build two Woodcutters' Camps.
Gather 10 ![]() Wood with your camps. with your camps.
Wood with your camps. with your camps.
2. Explore the forest.
2.a.i. Open 2 Glades.
2.a.ii. Have 5 Beavers assigned to be woodcutters at the same time.
2.b.i. Build a Small Foragers' Camp.
2.b.ii. Gather 5 ![]() Vegetables in the new camp.
Vegetables in the new camp.
2.c.i. Build a Stonecutters' Camp.
2.c.ii. Gather 5 ![]() Clay in the new camp.
Clay in the new camp.
2.d.i. Build a Harvesters' Camp.
2.d.ii. Gather 5 ![]() Plant Fiber in the new camp.
Plant Fiber in the new camp.
2.e.i. Build a Crude Workstation
2.e.ii. Produce 4 of each building material.
2.f.i. Open a Dangerous Glade
2.f.ii. Change ![]() Scrolls to
Scrolls to ![]() Fabric in the Ancient Shrine.
Fabric in the Ancient Shrine.
2.f.iii. 1 ![]() Ancient Tablet
Ancient Tablet
3. Keep the fire going.
![]()
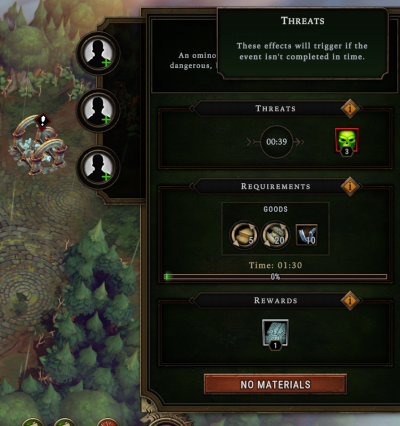
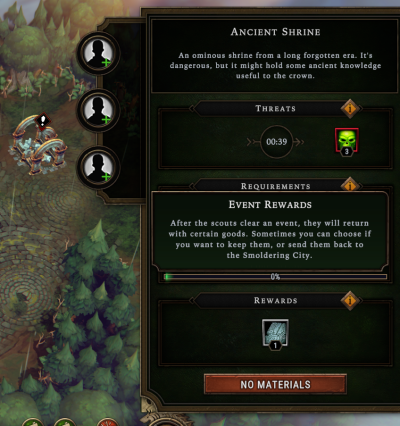
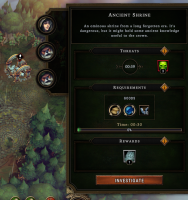
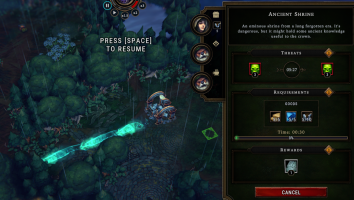
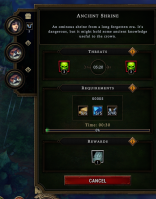
Open the Dangerous Glade, then pause the game for a few minutes to read about Glade Events.
![]()
The last Blueprint you receive is your choice of one from among the species-specific houses. The Human House, Beaver House, or Lizard House are all similar to the Shelter, but only house villagers of that species. They are much more expensive and also only house 2 villagers instead of 3. However, villagers get a bonus to their Resolve when they are housed in their species-specific houses.
![]()
When you have an objective like this that you need to meet, it's important to double-check that the Woodcutters' Camp can reach the trees you need to cut down. Remember that marked trees are highlighted yellow if they are in range and grey if they are not in range. The highlight color pulses slowly, so if you are having trouble seeing your marked trees try unpausing the game for two seconds to see if the highlight intensifies.
17. The Glade Event
Ancient Shrine
Glade Event
An ominous shrine from a long forgotten era. It's dangerous, but it might hold some ancient knowledge useful to the crown.
Pause the game. (If you didn't pause, and a bunch of things happened that surprised you, come back up here to read about what you missed.)
When the Glade opens, the contents icon gives you a summary of the Dangerous Glade's contents. The icon has a red border, instead of a green one, since there is a Glade Event with a threat. Hover over the preview icon to see the contents of the Glade, the Ancient Shrine.
The only contents of the tutorial's Dangerous Glade is the Ancient Shrine. In regular missions, Dangerous Glades have rewards, usually two or three small deposits of resources or mineable resources or a Geyser, a large deposit, and one or two other workable things, like Encampments, Ruined Buildings, or Caches. In other words, Dangerous Glades are significantly more rewarding than small Glades. However, they always contain a Glade Event with a threat that you must solve.
![]()
Click on the Ancient Shrine to open the Glade Event panel.
Ancient Shrine
An ominous shrine from a long forgotten era. It's dangerous, but it might hold some ancient knowledge useful to the crown.
Threats
00:39
Requirements
Goods
Time: 01:30
Rewards
Similar to a building panel, the Glade Event panel has worker slots. Some Glade Events can have 2 workers; this one can have 3. There are three main sections of the Glade Event:
- Threats
- Timer
- Effects
- Requirements
- Goods
- Time
- Rewards
The next sections will go into these details.
At the bottom of the panel is the big button to start working the Glade Event. Currently, it says No Materials, but it could also say No Workers, Choose Reward, Investigate, or Cancel, informing you about what you need to or can do next.
The same button at the bottom is used to start and stop working the Glade Event, so use caution.
17.a. Glade Events: Threats
Threats
These effects will trigger if the event isn't completed in time.
This threat happens only 40 seconds after you open the Glade, and you cannot finish it by then. The tutorial gives you a threat that you cannot avoid in order to show you how Glade Events work and how to understand the Glade Events user interface.
The threats section shows two items, the timer and the curse. The display is indicating, with a subtle arrow graphic under the time, that once the timer finishes counting down, the effects on the right will happen. This Glade Event has only one threat effect; many have two, for example a curse like this one accompanied by a second effect that gives you a penalty of 1 point of the Queen's Impatience.
The threat timer begins when the Glade is opened, regardless of whether you've seen the Glade, the Glade Event, or the threat timer. Take note of the sound when a Dangerous Glade is opened, and familarize yourself with the preview summary icon so that you recognize it when it pops up. This will reduce the likelihood that a Glade Event threat timer starts without you realizing it.
Generally speaking, the sooner you start working a Glade Event, the more likely it is you will avoid its threats.
Curse of the Forefathers
Disturbing the ruins of the Great Civilization can have grave consequences. Kills 3 random villagers.
When the threat timer elapses, 3 villagers, chosen at random, are killed. Three blue magic wisps will travel from the shrine to seek out the 3 chosen villagers and kill them.
![]()
You receive a penalty to the Queen's Impatience whenever a villager dies.
17.b. Glade Events: Requirements
Event Requirements
To complete an event, you must deliver specific goods, or withstand a period of hostile effects while the event is being worked on. Sometimes both of these requirements apply.
This Glade Event has four requirements. Three stacks of different goods must be delivered, and the work timer must be completed. The timers in the threats and requirements sections are different. The work timer in the requirements section starts only after all the goods are delivered and at least one worker is there and working the Glade Event (similar to how they must be in a building making a product). Comparing the two timers shows that it is impossible to finish this event before the threat effect happens: The threat effect happens in less than 40 seconds, and it will take longer than that to deliver items from the warehouse and finish the work timer.
In regular missions, threat timers are typically around eight or nine minutes, and work timers are typically around three or four minutes.
Other Glade Events have no goods required but will have a hostile Working Effect that lasts from when you click the red button until the working timer has elapsed. For example, temporarily increasing Hostility of the forest. Since villagers have to walk to the event, the total time the village must withstand the hostile Working Effect will actually be longer than the timer in the requirements section.
![]()
When you assign workers, the panel shows that amount of time required to work the Glade Event goes down, because the work is split evenly between the workers. (This is unlike buildings, where workers produce independently.) With one worker, this event requires one and a half minutes; with three workers it requires thirty seconds.
![]()
Because the working timer cannot start right away, consider the time it will take villagers to deliver goods when you prediction when you need to start working on a Glade Event in order to finish it on time.
![]()
Most Glade Events require more goods than a single villager can carry, so multiple trips between the closest Warehouse and the Glade Event will be required to deliver the required goods. Consider this time carefully when planning when to start working a Glade Event.
![]()
Some Glade Events will have a compounding negative effect with the Storm season. If the threat is dangerous enough, you may have to start working the event during the Storm anyway.
17.c. Glade Events: Rewards
Event Rewards
After the scouts clear an event, they will return with certain goods. Sometimes you can choose if you want to keep them, or send them back to the Smoldering City.
Glade Events, when solved, can provide game-changing rewards: valuable goods, perks, and even metaresources for permanent upgrades. As soon as the working timer is completed, the workers begin to loot the Glade Event.
In the tutorial, you do not have a choice and receive one ![]() Ancient Tablet. In regular missions, you almost always have the choice between (a) valuable goods and perks and (b)
Ancient Tablet. In regular missions, you almost always have the choice between (a) valuable goods and perks and (b) ![]() Amber and Reputation points.
Amber and Reputation points. ![]() Amber is the coinage used for trading. (Trading is not discussed in this walkthrough.)
Amber is the coinage used for trading. (Trading is not discussed in this walkthrough.)
![]()
All negative effects and threats end* when the working timer is completed. Rewards will still be visible in the Glade Event panel, and the building or structure will still exist on the map while villagers loot the Glade Event.
- Curses that have already been cast but have not yet reached their targets will still finish happening.
![]()
The Reputation reward from one Glade Event can be the deciding factor in winning or losing a mission. However, getting the right goods and perks can often result in gaining even more Reputation through Resolve. The best choice depends on what your village needs now and later.
17.d. Glade Events: Starting
Now that we've read through the panel, it's time to get the event working. The Order reminds you to look at the good required by the event. Your village does not have ![]() Scrolls, but if you look at the alternatives, we do have
Scrolls, but if you look at the alternatives, we do have ![]() Fabric. Just like some Recipes in buildings let you swap ingredients, almost all Glade Events requiring goods offer you options for which goods you can use to satisfy the event.
Fabric. Just like some Recipes in buildings let you swap ingredients, almost all Glade Events requiring goods offer you options for which goods you can use to satisfy the event.
Once you assign workers, the red button changes to say Investigate, which means it's ready to work.
![]()
17.e. Glade Events: The Curse Happens
When the threat timer finishes, there is a sound and three green wisps leave the shrine and seek out three random villagers to kill them. As mentioned before, this is unavoidable, so that you don't leave the tutorial without seeing the downsides of a dangerous Glade Event and get to see how to read about them in the user interface. In the screenshot above, the curse happens while the last 5 ![]() Tools are still being carried to the worksite. The first Beaver has nothing to do but wait for those goods to arrive, since they can't start working yet. It takes well over 40 seconds for the goods to be delivered to the event, and they still have to work it for 30 more seconds.
Tools are still being carried to the worksite. The first Beaver has nothing to do but wait for those goods to arrive, since they can't start working yet. It takes well over 40 seconds for the goods to be delivered to the event, and they still have to work it for 30 more seconds.
Notice how things changed under Threats in the Glade Event panel. The curse that just happened moved to the left side, as a record of what has already happened. Now, a new timer has started, and in five and a half minutes another three villagers will be killed by the Glade Event. Fortunately, the goods are almost delivered, and then there's only thirty seconds of work to do, so they will finish working before the next curse happens.
![]()
Through random chance, the Glade Event could target and kill the workers of the event. Be sure to follow along carefully what happens when threat effects happen, or you could face an unexpected second threat effect.
Alerts
A Human (Craftsman) died!
A Human (Forager) died!
A Human (Stonecutter) died!
The curse will seek out the three villagers the event targeted, at random, and kill them. In the screenshot above, the three that were killed were workers at the Crude Workstation, Small Foragers' Camp, and Stonecutters' Camp, respectively. If any of those workers were essential to completing the Glade Event, then you would need to replace them immediately. For example, if you did not yet have enough ![]() Fabric, it is critical to know that the worker in the Crude Workstation was killed!
Fabric, it is critical to know that the worker in the Crude Workstation was killed!
17.f. Glade Events: Finishing
When the workers finish working the Glade Event, the threat (and any hostile working effect, if there is any) goes away. The workers are free to loot the Glade Event. Typically, this can require quite some time and many trips between the event and the nearest Warehouse, since Glade Events can reward several stacks of dozens of goods each. In the tutorial, there is only one item, and only one worker is needed to carry it back to the Warehouse.
![]()
Wait for the worker to deliver the ![]() Ancient Tablet. The Order will be marked as ready to deliver.
Ancient Tablet. The Order will be marked as ready to deliver.
18. Delivering the last Order
Once the ![]() Ancient Tablet arrives at the Warehouse, the last Order will be ready to be delivered. You will receive 30
Ancient Tablet arrives at the Warehouse, the last Order will be ready to be delivered. You will receive 30 ![]() Amber, the coinage used in trading, and 1 Reputation point. Note that earning this Reputation point will fill the blue Reputation meter at the bottom of your screen.
Amber, the coinage used in trading, and 1 Reputation point. Note that earning this Reputation point will fill the blue Reputation meter at the bottom of your screen.
![]()
Deliver the Order. The Reputation bar will finish and the victory screen will appear.
19. Victory!
Settlement Complete!
This village has been secured. But there is one more test of your skills.
Congratulations! You finished the first tutorial mission!
The victory screen shows you that you gained the required amount of Reputation points before the Queen's Impatience ran out.
This screen shows how this mission factors into your metaprogression: your rank, achievements, and progress of unlocking all of the content in Against the Storm. That's another topic for another guide. On the left, you see your metaprogression level (Level 1), and that this mission earned you 70 experience points towards Level 2. On the right, you earned 10 ![]() Food Stockpiles, a metaresource for unlocking and upgrading your missions.
Food Stockpiles, a metaresource for unlocking and upgrading your missions.
At the bottom, the screen shows you that you have unlocked the ability to build all the following buildings at the beginning of any mission, in other words, a permanent Blueprint:
- Woodcutters' Camp
- Small Foragers' Camp
- Stonecutters' Camp
- Harvesters' Camp
- Crude Workstation
- Small Hearth
- Warehouse
- Trading Post
- Farm Field
Clicking Continue starts the second tutorial mission.
"Keep the fire going"
One more word about the objectives we were originally given.
![]()
New objectives:
1. Build a Woodcutters' Camp.
2. Explore the forest.
3. Keep the fire going.
The third objective to keep the fire going was not given any additional instruction in the tutorial or before this in the guide. You may have come across the issue when managing your workers.
There is a worker at the Ancient Hearth, at the center of your settlement, who delivers fuel when needed to keep the fire going in the Hearth. If you felt limited on workers, you may have removed the worker from the Hearth to reassign them. If they were unassigned for long enough, the fire may have gone out. When the fire goes out, villagers immediately experience a huge penalty to their Resolve. As long as you kept the fire going, with a worker assigned to the Hearth, and had fuel, you shouldn't have experienced much difficulty with the tutorial. If nothing else, Keep the fire going was a reminder that settlements are fragile, and things can go wrong quickly in Against the Storm!
Recap
In the tutorial, you learned a lot about how Against the Storm works:
- most of the user interface elements
- the core winning and losing conditions of Reputation and the Queen's Impatience
- most core randomized mechanics: Blueprints, Buildings, Orders, Cornerstones and Perks, Newcomers, Glades, and Glade Events
- Recipes, ingredients, and swappable ingredients
- villagers, workers, carrying
- marking trees and opening glades
- gathering range and resource deposits
There's plenty still to learn!
- Resolve and favoring
- Hostility of the Forest
- Forest mysteries
- trading, traders, and trade routes
- villager needs
- the Hearth and sacrificing goods
- housing and the Hearth range
- consumption control
- Services and Service buildings
- supply chain, building storage
- multiplicative effects, like in perks
- Recipe priorities, ingredient priorities, and production limits
- roads
- decorations, hubs, and hub upgrades
- Citadel resources, Citadel upgrades and unlocks, and metaprogression
- Deeds and achievements
 Hooded Horse Wikis


