Tutorial Walkthrough
Welcome, new player!
In response to recent posts on social media expressing confusion during the tutorial, we put together this walkthrough guide. This guide is intended to be followed along while you click through the tutorial missions. Besides reminding you of your instructions and objectives, this guide will provide as much clarity as possible about what is happening and expected—and occasionally include further explanation when it helps explain why something is happening or expected.
If you're feeling even a little confused or not following along why certain things are happening (or not happening), this guide attempts to answer those questions.
If you are familiar with some things but not others, skip paround using this wiki article's table of contents.
Note for players already familiar with game mechanics: This guide does not go into strategy or optimizations. Such information is contained elsewhere in the wiki. Certain things will be omitted here for the sake of clarity about core concepts, so you are encouraged to use this wiki until you have mastered the basics.
For the most part, things will be explained here in this article, without making you click around this wiki. However, plenty of links are provided, should you wish you explore.
Starting the tutorial
This screen greets you when you load the game for the first time. There may be popups about upcoming or recent patch notes, "What's New," etc.. Feel free to ignore these until you become acquainted with the mechanics.
Click Play on the left to start the tutorial. A loading screen will show up, and the intro video will play.
| The world is plagued by the Blightstorm - a vile cycle of destruction ravaging everything in its path. The only safe haven is the Smoldering City, where the mysterious Scorched Queen reigns. | You are one of her viceroys - a pioneer sent into the wilds, tasked with with establishing new settlements and acquiring valuable resources for the crown. | Your goal is to help rebuild the Smoldering City, and secure the future of the Queens' subjects. |
The first part of the first mission: Orientation
The first part of the tutorial orients you to four core mechanics:
- moving the camera around your town
- winning and losing the game
- blueprints for buildings
- pausing and unpausing the game
The Queen's Envoy is your in-game guide, providing you with instructions on how to complete the tutorial. This character does not play a major role in the game besides the tutorial.
Camera controls
Use [W, A, S, D] or the mouse to move the camera.
The first step is knowing how to look around. In Against the Storm, you can move the camera forward, backward, left, and right to look around your settlement. Right now, you can see all your villagers and buildings, but you'll need to look around into the forest to plan where to expand.
Press W, A, S, and D to move the camera forward, left, backward, and right. The tutorial box will disappear, and a new UI element will appear in the bottom right.
You can also move the camera by moving the mouse cursor to the edges of the screen, which will push the camera in that direction. The third way to move the camera is to hold the right mouse button and drag in the direction you wish to move.
You can also orbit the camera around the center of the screen, to look at your town from a different angle. Press H to recenter and reorient the camera to the village center.
You can customize the camera controls in the game options. Press Esc to open the in-game menu, click Options, and click the Key Bindings tab at the top.
The Queen's Impatience and losing the game
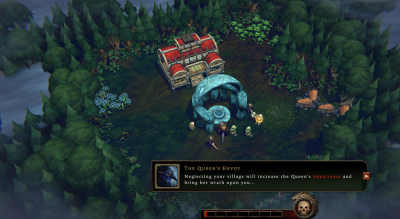
Neglecting your village will increase the Queen's Impatience and bring her wrath upon you ...
The tutorial introduces the Queen's Impatience, represented by a bar on the bottom right of your screen. This bar fills up with a bright red color, from left to right towards the skull icon. The bar fills gradually during the course of the game. When the bar fills up completely, you run out of time, lose, and cannot continue playing the town. You will have to start a new town.
Most of the time, the value of the Queen's Impatience simply increases at a slow and steady rate. However, some mechanics cause a large immediate penalty, like making the bar jump up by +1 points instantly because you didn't finish an objective in time. There are also ways to subtract points from the Impatience bar, thereby adding time to finish the mission. Finally, the rate of increase can speed up or slow down based on your decisions and random events.
Click the arrow to continue. The tutorial box will disappear, and a new UI element will appear to the left of the Queen's Impatience.
You can see the current value (0) and the rate (+0.15 per minute) at which the Queen's Impatience is increasing. Hold your mouse cursor over the Impatience bar or the skull icon.
The Queen's Impatience does not increase while the game is paused. Since the tutorial starts paused, the bar is not filling up yet.
Reputation and winning the game
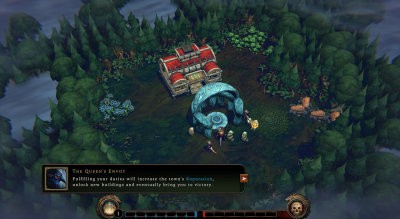
Fulfilling your duties will increase the town's Reputation, unlock new buildings and eventually bring you to victory.
Next, the tutorial introduces Reputation, a bar representing your progress towards winning the mission. This bar fills up blue, from right to left towards the crown icon. Your town gains Reputation when you complete town objectives, make decisions that reward Reputation points, and when your villagers are especially satisfied.
Unlike the Queen's Impatience, Reputation does not gradually increase at the beginning of each mission. Rather, after you have made some progress building the town and met specific conditions, your town starts to gain Reputation points gradually. This means that you can run out of time and lose the game before you gain any Reputation points.
If the Reputation bar fills up before the Queen's Impatience bar, you win the mission.
If Impatience fills up before Reputation, you lose the mission.
Click the arrow to continue. The tutorial box will disappear, and the crown icon will start glowing.
You can see the current value (0.0) of your town's Reputation. Hold your mouse cursor over the Reputation bar or the crown icon.
Blueprints
Now, choose a new blueprint. Click on the crown icon below.
Next up, you are given your town's first Blueprint.
A Blueprint is the ability to place a building in your town. Most of the buildings in Against the Storm require you to have the Blueprint before you can build it in each town. For example, before you can place a Small Farm in a new town, your town must get the Blueprint for the Small Farm.
There are several ways to get Blueprints. When you earn the choice of a new Blueprint, the tutorial is showing you how to choose it.
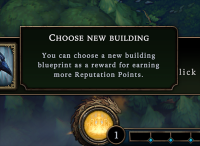
You can choose a new building blueprint as a reward for earning more Reputation Points.
You get to choose this Blueprint because it is the beginning of a new town. This tooltip is telling you that you can earn more choices by earning more Reputation. At milestones of Reputation, you earn Blueprints. Do you notice the small blue pips at the base of each line on the Reputation bar in the screenshot? Those are the Reputation milestones. When your town's Reputation rises above each milestone, you earn one more Blueprint.
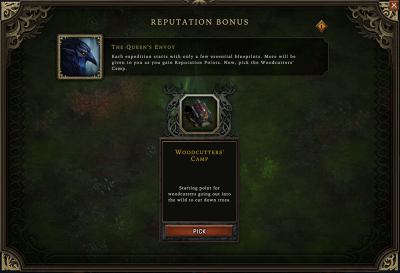
Click the crown icon. A large panel opens labeled Reputation Bonus opens.
Choosing your first Blueprint
Each expedition starts with only a few essential blueprints. More will be given to you as you gain Reputation Points. Now, pick the Woodcutter's Camp.
First things first. During the tutorial, you don't have any Blueprint options; the tutorial determines which Blueprint you get next. In regular missions, when you earn the choice of a new Blueprint, you will get to choose from a few options.
When you're first starting to play Against the Storm, you will get three free Blueprint choices at the beginning of every town. You will only have a few to choose from for each of those choices. For example, for your first Blueprint, you may be given the choice of the Herb Garden, Plantation, or Herbalists' Camp. After you pick one, then you'll get three new options for your second Blueprint from which you can choose one, and so on.
Click Pick to choose the Blueprint for the Woodcutter's Camp. The big panel will close so you can see your village again.
You may see options for Blueprints appear more than once for a town. However, the game will never waste one of your options on a Blueprint that you already have.
Unpausing and time controls
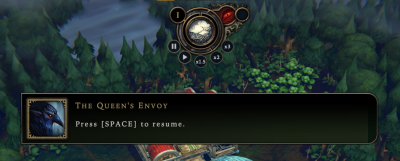
Press [SPACE] to resume.
Pausing and unpausing may be the game control you use the most often. When the tutorial started, the game was paused. The villagers were still, Impatience was not increasing, and nothing in the game world was getting better or worse. When the game is paused, you are free to take as much time as you need to plan, look through your town and the forest, make decisions, and step away from your computer.
Press the Spacebar to unpause the game. The tutorial message will disappear, the rain will start falling, and your villagers might start moving.
There is a lot going on in the time displays and controls. Feel free to hover the elements and read the tooltips about them, but for this guide we'll focus on them as things come up, so that you have the right context for understanding why each one is important.
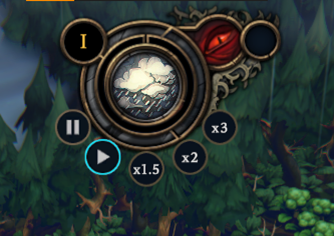
The time controls let you pause, unpause, speed up, and slow down the game speed. These affect everything that happens in the world. If the game is sped up, everything happens faster relative to real-world time, with no exceptions. Timers on objectives, villagers' walking and working speeds, and how often villagers eat and rest are all proportionally sped up or slowed down so that there is no in-game advantage to playing the game faster or slower. It's up to your personal preference, and regardless of how fast the game time goes, you'll still find yourself pausing and unpausing frequently.
The controls are, from left to right, as you might expect:
- Pause
- Play (normal speed)
- x1.5 game speed
- x2 game speed
- x3 game speed
You can adjust the game speed with the keyboard instead of clicking on the control buttons. The keys are in the same order as the buttons on the screen: Press 1 for normal speed, 2 for x1.5 speed, 3 for x2 speed, and 4 for x3 speed.
Unpausing with the Spacebar takes the game speed back to whatever speed was most recently chosen before the game was paused.
The second part of the first mission: Buildings
The next part of the tutorial demonstrates the following core mechanics:
- the contruction toolbar
- building placement, including suitable ground and gathering range
- building materials and construction progress
- workers
Building the Woodcutters' Camp
Build a Woodcutter's Camp and explore the forest. You have to keep the fire going at all times.
If you dismissed the tutorial message by trying to pause the game again, don't worry, that's why this guide has screenshots. You can pause the game at any time.
When you unpaused the game, you saw the rain, villagers, fire, and the fog in the forest start to move.
Click the arrow or press the Spacebar to dismiss the tutorial message. Several new UI elements will appear at the top, bottom, and sides of the screen.
Now the game screen looks mostly how it will look in regular missions. The tutorial will explain most of these things soon. For now, you have new objectives.
1. Build a Woodcutter's Camp.
2. Explore the forest.
3. Keep the fire going.
1. Build the camp
You construct buildings with the buttons at the bottom of the screen, just above the Reputation bar. The button that the tutorial highlights for you is the one for constructing camps. Camps are the cheap, rough, yet essential buildings that almost every town uses to get started.
Your only available camp right now is the Woodcutters' Camp, since you just earned that Blueprint. After the tutorial, every town starts with the ability to build the Woodcutters' Camp and a few other camps without having to spend Blueprint choices on them.
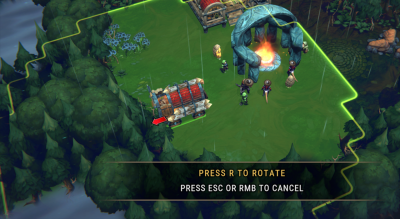
The camp has a footprint of 2x2 squares, and you will need to place it on suitable ground. The ground squares will highlight red underneath the mouse cursor wherever the building cannot be placed.
The large, circular green highlighting around the building is the gathering range. Any trees within the green range can be reached by this camp.
1. Click the ![]() Camps button. This will reveal the buildings currently available to your village.
Camps button. This will reveal the buildings currently available to your village.
2. Click the ![]() Woodcutters' Camp. The ghost of the building will appear on your mouse cursor, along with the gathering range around the building highlighted in green.
Woodcutters' Camp. The ghost of the building will appear on your mouse cursor, along with the gathering range around the building highlighted in green.
3. Click the ground where you want the building to be placed. The ghost and range highlight will be replaced by the building's scaffolding.
You can rotate the building so that it faces the closest trees. Press R to rotate the building counter-clockwise.
You can read more about the Woodcutters' Camp in the in-game Encyclopedia. Right-click on the camp icon before constructing it.
If you have already marked trees for cutting, you will see the trees' highlighting change from grey to yellow when they are in range of the Woodcutters' Camp. Without any marked trees, only the ground is highlighted to show the camp's range.
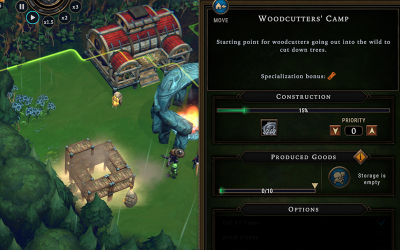
Once you unpause the game, the camp will be constructed by your villagers. None of your 9 villagers has any work, so they will automatically build for you. You do not need to tell any of them to do it. (In fact, you can't issue commands to villagers in Against the Storm.)
One villager will first need to go to the big red building, the Main Warehouse. They will pick up the 2 ![]() Parts that are required to build the Woodcutters' Camp. That villager will carry the Parts to the scaffolding then start construction.
Parts that are required to build the Woodcutters' Camp. That villager will carry the Parts to the scaffolding then start construction.
Unpause the game. After a while, construction will be finished.
Once a building's scaffolding contains all the required materials, villagers can start construction. In the case of the Woodcutters' Camp that only requires the 2 Parts, once the one villager returns with the Parts, other villagers will join in to make construction go faster.
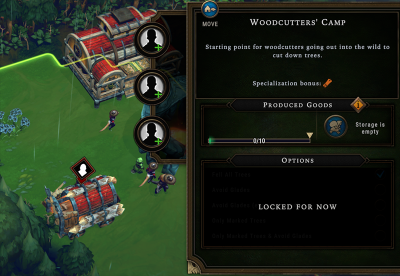
The camp is finished. There's a warning icon above the building, because the camp needs workers. No trees will be cut or wood gathered until there are workers at the camp.
There are times when you will want to have no workers in a building, but this is not that time. If you haven't already, click on the Woodcutters' Camp to open its building panel.
You have 9 villagers with nothing to do right now. You might as well put to work as many as possible.
Clicking the first blank worker icon in the building, and choose one of the villagers.
Beavers are the best option for the Woodcutters' Camp because of the camp's Specialization Bonus, Wood. Beavers have this Specialization, so they get a small chance of gathering bonus wood from trees.
You may want to build a second Woodcutters' Camp and assign 3 more workers. You might place it to get different trees cut down or to get the same trees as the first camp cut down faster.
 Hooded Horse Wikis


