Units
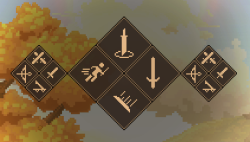
Units can be given orders to hold position, attack, follow or shield wall. If ordered to attack the units will run towards enemies until they capture a new capture point or die. A Shield Wall can only be ordered if there is at least one ![]() Shielded Swordsman among the units. Commands can be given either to all units or only to certain types. Newly trained units will automatically run to the last captured gate.
Shielded Swordsman among the units. Commands can be given either to all units or only to certain types. Newly trained units will automatically run to the last captured gate.
City units
City units are trained at city buildings. They can have their health, attack speed and range upgraded and most of them can also be upgraded to a more powerful version via the Advanced Technology upgrade at the building they were recruited from.
Mercenaries
Mercenaries are trained at outposts. Each outpost can only support one mercenary. They are trained instantly and if killed will respawn. All mercenaries cost ![]() 300 Silver,
300 Silver, ![]() 100 Food and
100 Food and ![]() 4 Unit.
4 Unit.
 Field Medic heals units, Thorald and himself.
 Hunter attacks faster than regular ranged units.
 Pyromaniac creates fire areas that damage all enemies and may set them on fire, making them run away until they die. Allies are not affected by the fire.
Bishop Elmold Bear
In the Bishop Elmold land there is a captive bear. You can free it by attacking the chains. The bear will charge throughout the map, attacking any enemies or buildings. Unfortunately this also means it will destroy fortifications you can use if you free it before capturing the first outpost.
 Hooded Horse Wikis
