Beginner's Guide: Difference between revisions
Tags: Manual revert Reverted |
Tag: Manual revert |
||
| Line 48: | Line 48: | ||
==== The Council ==== | ==== The Council ==== | ||
[[File: | [[File:TheCouncil11.png|right|500px]] | ||
The Councilor Assignment Phase is where you decide what missions your council will be doing during the next cycle. Your council is composed of up 6 characters from various walks of life. | The Councilor Assignment Phase is where you decide what missions your council will be doing during the next cycle. Your council is composed of up 6 characters from various walks of life. | ||
Revision as of 02:24, 24 September 2022
Starting a New Game
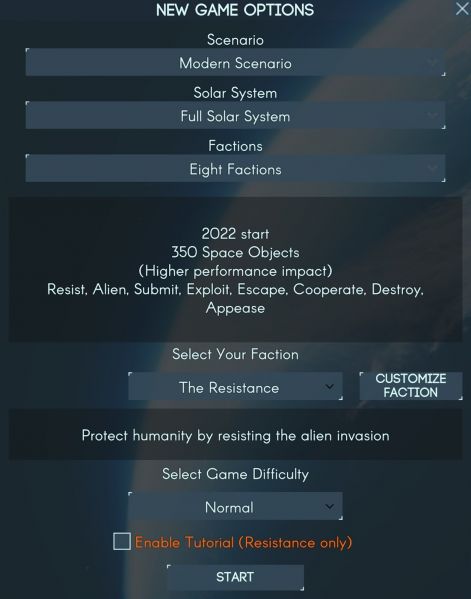
After selecting ‘New Game’ on the main menu, you will be presented with the following. For this guide, these are settings that have been used.
Solar System and Faction count can be adjusted freely, and parts of the guide will be applicable to all factions, but certain story related events, etc. will differ if you choose to play as someone other than the Resistance.
Enabling the tutorial will provide some additional guidance in game about basic features.
Strategic UI Overview
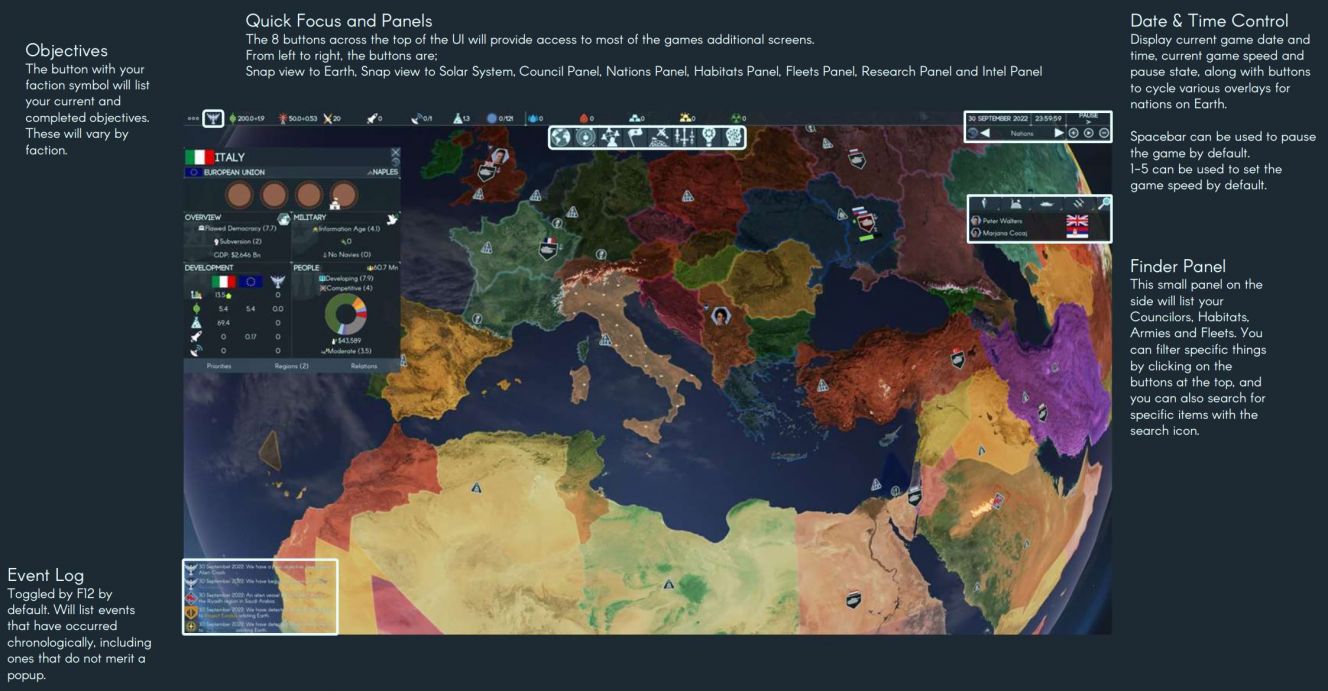
The screenshot below highlights some key UI features:
- Objectives
- Quick Focus and Panels
- Date & Time Control
- Finder Panel
- Event Log
Events
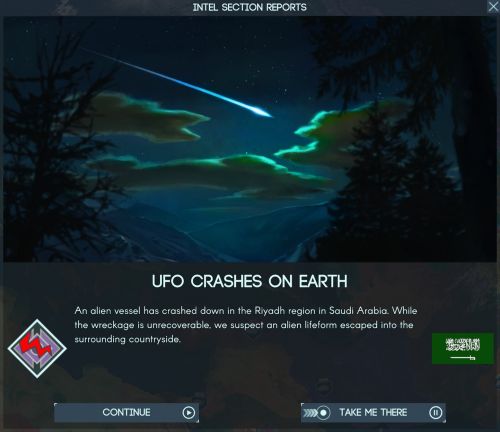
When you first start, you will also have an Event popup in the middle of your screen. When these occur, the game will automatically pause.
Significant events that occur, along with Councilor mission reports, will have a similar pop up later on in the game. Generally these will have 3 options (along with some additional ones for repeatable missions):
- Continue – will close the popup and unpause the game.
- Close – will close the popup, but leave the game paused.
- Take Me There – will close the popup and keep the game paused, and snap the camera to relevant location on Earth or in the Solar System.
The First Days
Councilor Assignment Phase
The game initially starts paused, shortly before the first Councilor Assignment Phase. These are one or two week cycles during which your Councilors will complete the missions assigned to them.
The first thing we need to do (after reading through our initial events) is to unpause the game (spacebar or 1-5 by default) and let it run until it automatically pauses again, and the CONFIRM ASSIGNMENTS button appears at the top of the UI.
The Council
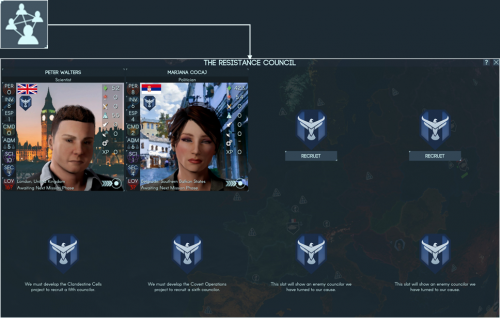
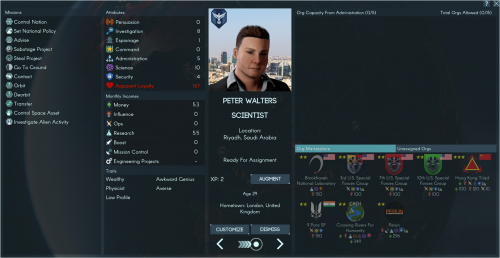
The Councilor Assignment Phase is where you decide what missions your council will be doing during the next cycle. Your council is composed of up 6 characters from various walks of life.
You may note that right now you only have 2 councilors listed in the Finder Panel on the right of the screen. You start with the capacity for 4, and this can be increased to 6 via technology. In addition to this, you can have up to 2 enemy councilors that you have turned to your cause.
Therefore, the first thing we need to do is to figure out who in our council should do what this cycle, and what gaps in our line-up we need to fill by hiring additional councilors.
To do this, we can click on the Council Panel button just above the CONFIRM ASSIGNMENTS button to open the relevant panel.
The Council Panel presents an overview of your current council, and a brief summary of their attributes.
By clicking on the portrait of one of your councilors, you will be taken to a more detailed screen with information on them, including the missions they are capable of, their attributes and incomes, their traits, and organizations controlled by them as well as available for purchase or assignment.
Of interest to us here initially is mainly what missions they are capable of, and their attributes.
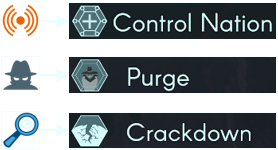
The first stage of the early game is about getting a foothold on earth, and to do this requires either taking uncontested ‘Control Points’ (CP) or taking over CP already controlled by another faction – these are done via different missions, and use different attributes.
Uncontrolled CP are taken using the Control Nation mission, which is governed by the Persuasion attribute.
CP controlled by another faction are taken using the Purge mission, governed by the Espionage attribute.
CP can be made more vulnerable to Purges by the Crackdown mission. This is governed by the Investigation attribute. Crackdowns will also remove the benefits provided by a CP to an enemy faction.
Take a moment to look through your two councilors. In addition to the above, it is also worth paying attention to their Administration stat, any possible Income (note this is monthly, whereas the resource panel is daily by default), along with their Traits (which can affect how they perform on mission and their incomes significantly).
Recruiting Councilors
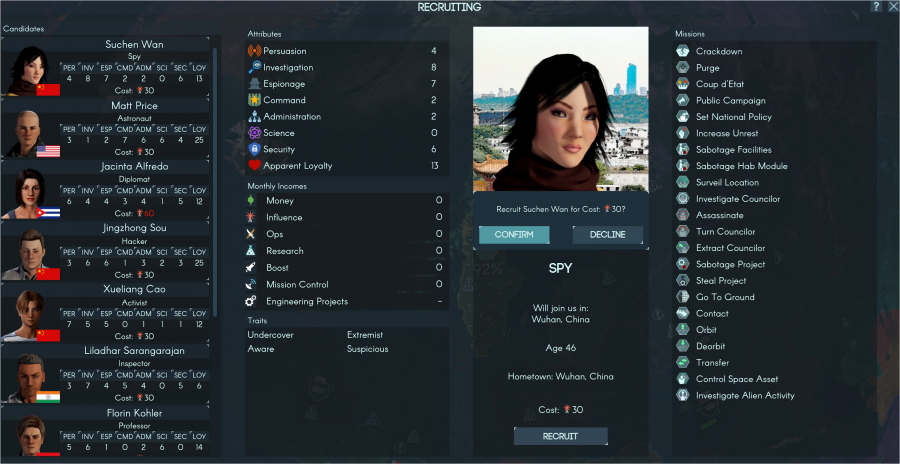
Once you have done that, return to the Council Panel, and lets take a look at hiring a third councilor, by hitting ‘Recruit’ either on one of the empty slots, or at the bottom of the Council Panel.
This will open a page with a list of candidates on the left side – clicking on them will provide information similar to what you were provided on your own councilors.
New councilors cost either 30 or 60 Influence to recruit. As we only start with 50, we will only be able to fill one of the two free slots we have.
Bearing what was described above in mind, and depending on your initial councilors, you will want to pick someone out to round out your roster. If you already have 2 councilors capable of the Control Nation mission, then hiring one capable of the Purge and Crackdown missions might be a good move. If you only have one councilors capable of the Control Nation mission, I would hire a second councilor with that mission available. In both cases it is worth it to also pay attention to their attributes for those relevant missions, as well as their Traits and Income.
When you have hired a third councilor, close the Council Panel, and lets proceed to assigning missions to your team.
The Mission Interface
When a councilor is selected during the Councilor Assignment Phase, additional UI elements appear allowing you to assign missions to them.
At the bottom of the main interface, you will see a panel which allows you to select from the missions available to the selected councilor.
Above that, the chances of success are shown, along with the factors that are both positively and negatively affecting these chances.
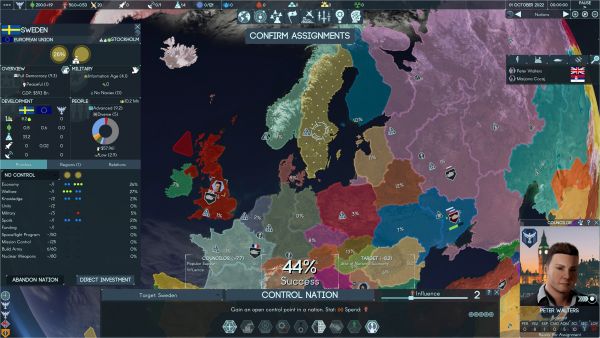
In addition to this panel, when you have a mission type selected which targets nations or other councilors, the base chance of success for that mission is shown on the map.
In the example on the right, you can see that for the selected Control Nation mission this ranges from 0% to 38%.
The mission selection panel shows the available mission types for that councilor, with ones with no valid target or insufficient resources to perform shown dimmed out.
Information on the which Attribute governs the mission, as well as which resource can be spent (by moving the slider in the top right) to boost the chances of success.
The mission assignment can be confirmed by clicking on the mission name (Control Nation) in the top middle of the panel.
Initial Mission Assignment
For this initial phase, if possible assign 2 of your councilors to Control Nation missions (aimed at countries with high base chances of success), and one to the Investigate Alien Activity mission. You can boost the Control Nation missions with some influence, but try to keep some in reserve.
You can click on nations to get more details on them, displayed on the left side of the screen. Take some time to look through a couple, there are extensive tooltips describing the various metrics that are tracked for nations.
Nations with higher levels of Public Support (a bigger slice of your colour in the donut) will be significantly easier for you to bring under your control. Public Support can be raised with the Public Campaign mission (governed by the Persuasion attribute).
Once you have finished assigning missions to all of your councilors, hit the CONFIRM ASSIGNMENTS button near the top of the screen to lock in your mission selections.
Starting Research
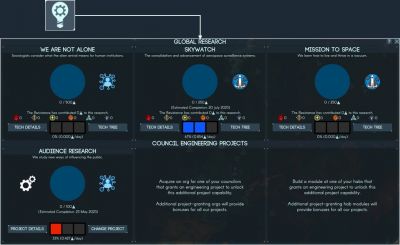
The final thing we want to look at before unpausing and beginning our campaign for real is Research, which is managed via the Research Panel. This can be accessed by clicking on the relevant button at the top of the UI. This page is split into 2 sections.
Global Research is shared research conducted across factions. These global technologies advance the general scientific understanding of humanity, and unlock various faction-specific Projects. Each faction can choose if they want to contribute research towards these, and how much. The faction contributing most research to a particular slot will choose the next technology to be researched by that slot. There are always 3 slots.
Council Engineering Projects are faction-specific projects with tangible results. These results can include bonuses to missions, additional councilor slots, new ship or habitat modules, various projects related to story progression, etc. You have a single slot for them to begin with, and can gain one additional one via an Org, and a second via a suitable equipped Habitat.
Council Engineering Projects can be freely switched around using the Change Project button. Global Research, once selected, is locked in to its slot until research is complete.
You can control the distribution of your research points using the 3 ‘pips’ located in the panel for each technology/project. These affect the relative distribution of your Research Points (daily income can be seen in the top resources bar) – if you have a total of 3 pips assigned like in the example on the right, and 2 are on a particular technology, then that technology will get 2/3 or 66% of your Research Points.
Once you have done the above, you can unpause the game and let it run. The next Councilor Assignment Phase will happen in one week. In the meantime, you will probably get a few events.
The First Weeks
Managing Nations
Once your Control Nation missions resolve, you may end up with a Control Point (CP) under your control. CP represent the various institutions and elements that hold power inside a nation. There are between 1 to 6 CP in each nation. Larger nations with bigger economies will have more CP, representing the increased difficulty in obtaining full control of more powerful nations.
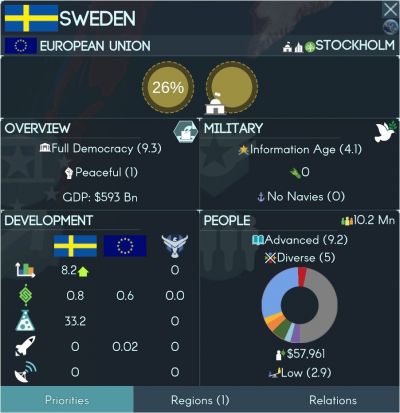
The rightmost (or in the case of nations with only 1, the only) CP is always the Executive CP, and represents the most powerful office(s) in the nation. When taking control of a nation with multiple CP, you can only attempt to gain control of the Executive CP if you already have at least 1 other CP in the nation. In the example shown to the right, we have taken the only other CP in Sweden, leaving the Executive as our next target.
If you did not end up with CP after your first Councilor Phase, that’s okay – you can just repeat the process earlier in this guide (perhaps hiring an additional councillor to help out), until you do end up with a CP. It can also be beneficial to Boost the mission by spending Influence.
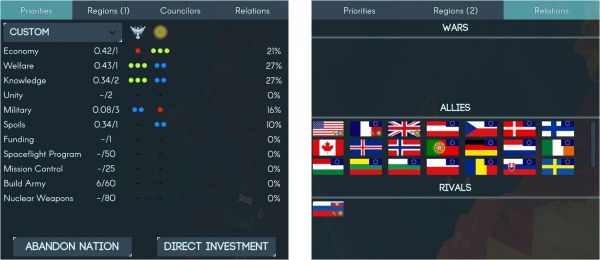
Control CP allows you to affect the nations Priorities, which determine where they will spend their national budget. By default, they will be set to your Factions default Priority template, but you can adjust them by clicking on the pips beside each category – these work the same way as in Research, with your portion of the budget (so for example, 50% per CP in a nation with 2 CP, 25% per CP in a nation with 4, etc), split between the pips according to their distribution. Uncontrolled CP will have a default Priority configuration depending on the nations real world policies.
Once you control the Executive CP of a nation, you will also be able to adjust the nations foreign policy. This is done via the Relations tab, where a Manage button will appear once you have control of the executive CP. With this you can pay Influence to change your stance towards other nations from Allied to Neutral to Rival. Changes have a cooldown, so its worthwhile to plan ahead here.
In addition to the above, once you have the Executive CP, the Set National Policy mission can be used to perform other, more significant policy changes, such as declarations of war, forming federations, unifying with other countries, or disbanding armies.
Consolidating Power
With an initial foothold with some CP, your next priority should be to aim to take full control over some of these nations.
Nations with 2 CP are ideal for this, as once you have the first one, it is impossible for any of the other factions to take the Executive CP if it is uncontrolled (as doing so requires at least 1 other CP, which you have the only one of).
For larger nations, you may run into cases where another faction also ends up with a CP, and thus you only end up with partial control of the nation even if you take the Executive CP. This is where the Crackdown and Purge missions come in.
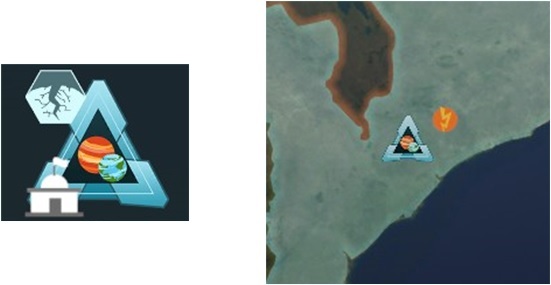
Crackdown can be used to disable and weaken a CP controlled by an enemy faction, and this will make it significantly easier to Purge. CP which have been affected by a Crackdown have the Crackdown mission icon on them in the Nation Panel, and a yellow/orange icon next to their on-map CP.
Purge is used to take control of a CP controlled by an enemy faction. Like Control Nation, taking control of an Executive CP requires control of at least one other CP in the nation. It is far easier to execute Purge missions against CP which are affected by the Crackdown mission.
Both Crackdown and Purge (and many other missions) are much easier to conduct in nations with high Public Support. The Public Campaign mission can increase this, and it is recommended to use it if you are attempting to go after larger (3 or more CP) nations, or enemy CP in nations with high Public Support for their faction.
The other symbol you may seen on the Nation Panel or on-map CP is the Defend Interests icon, indicated as the mission icon on the Nation Panel, and as a shield next to on-map CP. Defend Interests is a mission which will add this modifier to any CP under your control in the targeted nation, and any CP affected by this modifier become much harder targets for Crackdown and Purge missions. The modifier expires after a set period.
Go back to Main Page.
 Hooded Horse Wikis